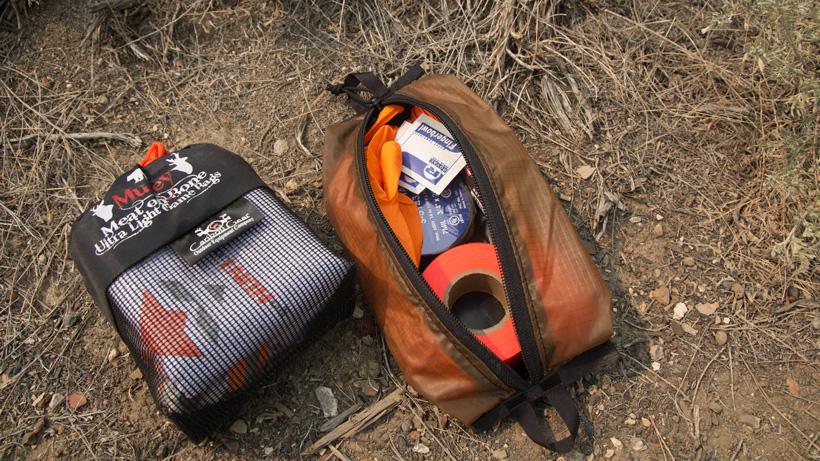


The goHUNT Kill Kit.


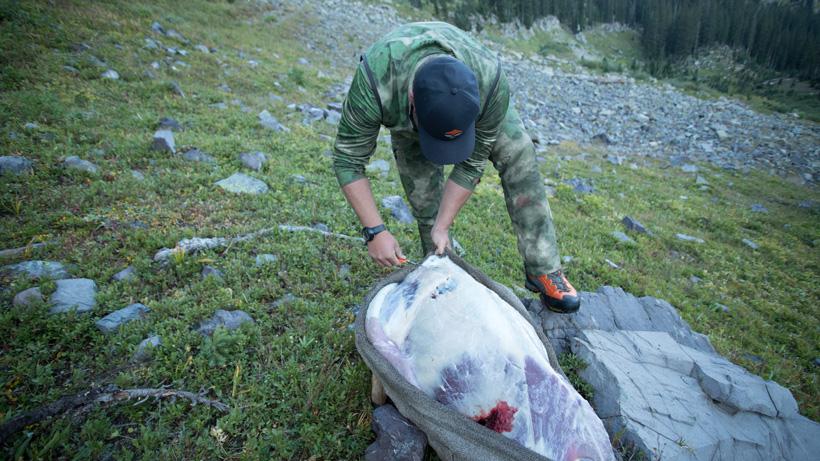
goHUNT's Brandon Evans performing the gutless method on deer. Photo credit: Lorenzo Sartini

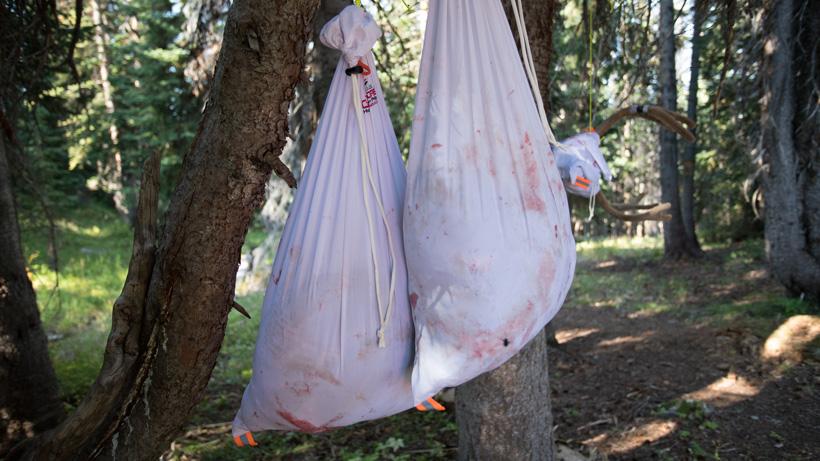
Meat hung and ready for packing out. Photo credit: Lorenzo Sartini
Method | Bone-in quarters |
|---|---|
Pros | Stays cleanerMuch easier to packMeat kept in larger portionsFaster when breaking down an animal |
Cons | HeavierHigher chance of spoilage |
Method | Bone-out quarters |
Pros | LighterFaster to cool down |
Cons | Doesn't pack as easyHigher chance of dirt and contaminationSlower method when processing |
Method | Pros | Cons |
|---|---|---|
Bone-in quarters | Stays cleanerMuch easier to packMeat kept in larger portionsFaster when breaking down an animal | HeavierHigher chance of spoilage |
Bone-out quarters | LighterFaster to cool down | Doesn't pack as easyHigher chance of dirt and contaminationSlower method when processing |

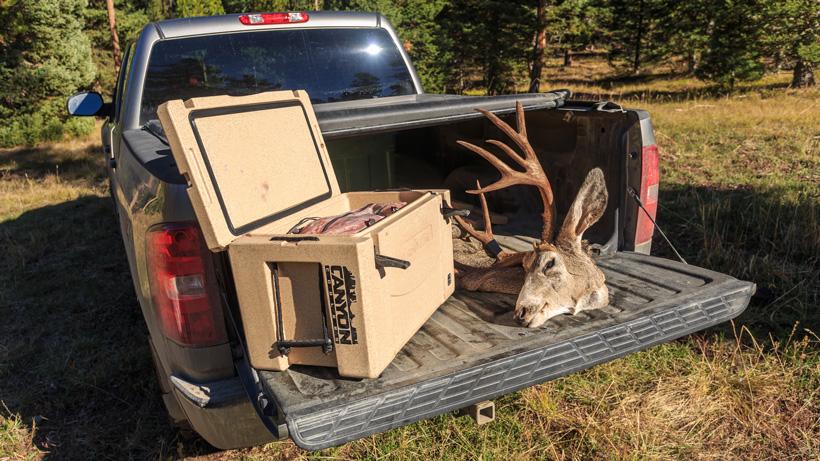
Meat loaded in a cooler back at the truck. Photo credit: Brady Miller

Over the past few years, I have written several articles for GOHUNT, detailing scouting for game, locating game, and techniques for taking game. One area, though, that I’ve spent only a brief amount of time on is handling your animal once the tag is punched. Meat care—specifically in the early season—is of utmost importance because that protein is our sustenance for the next year. Without careful planning, meat spoilage can happen in nearly any temperature range or weather conditions and having a solid game plan before hitting the hills can lead to a cleaner experience and a full freezer.
The GOHUNT Kill Kit.
Before beginning, I think it’s well worth your time to really look at your gear for meat care while in the field. For me, the big turning point was when I put together an organized kill kit, which is, essentially, a bag that houses everything I’ll need once the work starts. By having everything in one space, I have immediate access to all of my gear instead of fumbling around my pack with bloody hands, digging for another knife or game bag. Recently, I wrote an article on building your own kill kit, which had a comprehensive break down of game bag materials and the pros and cons of each.
When putting together your own kit, you should really take a look at what you’ll be hunting and the terrain that you will be in. When hunting mule deer you will not need the same size or the number of game bags like you would for elk and when hunting wide open terrain you may not need 100’ of paracord for hanging quarters. The bottom line is that being smart in your approach to your kill kit can save some weight on your back when you are covering miles. Recently, GOHUNT started offering premade kill kits that are customizable to your hunting style and utilizes some of the best meat care products available.
The main factors you’ll be battling will be spoilage from heat and bacteria or egg issues from flies. When an animal is downed in the early season, the first priority should be to get the hide off of the animal immediately. The hide will hold in an incredible amount of heat and can spoil the meat quickly even if left on for a short period of time. As quarters or scrap meat is removed, I liked to shuttle these portions to a cool shady area where the meat can then be hung or laid across downfall where it will receive adequate air flow. Even in some of the hottest temperatures, it’s possible to keep meat from spoiling with good airflow and shade.
Other than the heat, another source of constant annoyance when dealing with an animal in the early season will be bugs. Hornets will often attempt to eat the meat while common house flies will attempt to lay their eggs alongside them. Having good breathable game bags will be a must to keep the bugs at bay and keep your hard-earned protein clean and bacteria free. Another option that is made by Caribou Gear is game bag spray. This product helps prevent bacteria growth and also deters flies from landing on your game meat.
GOHUNT's Brandon Evans performing the gutless method on deer. Photo credit: Lorenzo Sartini
One of my favorite methods for handling early season animals is with the gutless method. By using the gutless method I can cut 10 to 30 minutes of work time off of breaking down the animal and greatly reduce the chances of any contamination happening in the situation that stomach contents come in contact with the meat. The biggest advantage here is just how much faster I can begin removing quarters and getting the meat cooled off.
One of the biggest dilemmas I generally run across when preparing to break down an animal is whether to leave the bone in on the quarters or to bone the meat out. Generally speaking, boned out meat will cool down quicker due to the smaller portions; however, you are also increasing the meat’s overall exposure to dirt and contaminants. It also takes more time to process and you will deal with a harder load to strap to a backpack. Bone-in quarters pack much easier and stay cleaner, but can spoil quicker and will be much heavier on your back.
Generally, this is going to boil down to a distance thing for me. If I am within a mile and a half of the truck or a road I will generally leave the bone in simply because the extra weight won’t make much of a difference for a short hike and I can get the meat out that much faster. Anything further than that and I am generally going to resort to boning out the quarters to save on weight. When boning a quarter I like to remove the meat by muscle groups or in the largest portions that I can. Once off the bone, I also like to lay these portions on a small tarp or game bag, bug permitting, and allow the meat to crust over and form a rind. This rind will keep things cool and protected during transport.
Meat hung and ready for packing out. Photo credit: Lorenzo Sartini
Once the meat has skinned up, I will transport the portions into a game bag to be hung from a tree or slung over a log. I also like to keep my meat in separate bags for organization and identification when I get home. For an elk, I’ll do rear quarters in their own respective bags with front shoulders, loins, neck meat, and brisket going into two more bags. Deer will be broken down into two bags: front half and back half.
When leaving the bone in on quarters it is important to keep in mind that the meat will spoil from the inside out, starting at the bone. To help the quarter cool down quicker, I will run my knife down to the leg bone starting at the hip on a rear quarter and follow the bone down the leg to the shank. On a front shoulder, I will usually run a knife down the ridge of the scapula and then fillet the meat along the blade slightly to allow the heat to escape. Opening the portions of meat down to the bone can really help in heat escape and can keep you from any unpleasant surprises once the butchering begins. Once a few cuts have been made into the quarters I will move these into game bags. Again, quarters will be hung or laid across downfall while waiting to be packed out.
Meat loaded in a cooler back at the truck. Photo credit: Brady Miller
Ideally, we would have a large cooler full of ice and ready to accept our hard-earned prize, but, obviously, this is not always the case. As meat is shuttled back to the truck, my main area of concern is where to store the meat in the interim until the bull or buck has been completely packed out. If my truck can be parked in the shade I may toss the meat in the bed, but many times I will still look for a shady area where the meat can again be hung or draped over downfall. Additionally, if any creeks are present its possible to totally submerge the quarter for quick and effective cooling. Before this is done, though, it’s important to note that moisture on your meat can lead to quick spoilage and a slimy mess. Instead, keep a roll of contractor bags in your pack or in your pickup to seal off the quarters first. Obviously, make sure there are no holes or tears to ensure that no water will find its way into the bag.
Once all of the meat has been successfully transported to the truck, I like to lay the meat towards the back of the bed so it will catch some airflow on the drive home. If I have to make any quick stops I will flip the quarters to get air flow on all sides. Additionally, when hunting a longer distance from home, I will stop for ice to fill a cooler once I reach a close town.
The most important factor of keeping meat in good shape during warm temperatures will be simply keeping a level head. Not all animals will die in easy spots and some ingenuity may be needed. When situations get tough I like to keep three things in mind: keep the meat clean, get the meat cooled down, and get the meat out as quick as possible. Hunting the early seasons and the accompanying warmer temperatures can definitely put hunters in a hurry once an animal hits the ground, but with a solid game plan and careful planning, a stressful situation can turn into delicious meals and great memories.