
Having a properly tuned bow and arrow setup is key to having maximum accuracy and confidence as a bowhunter
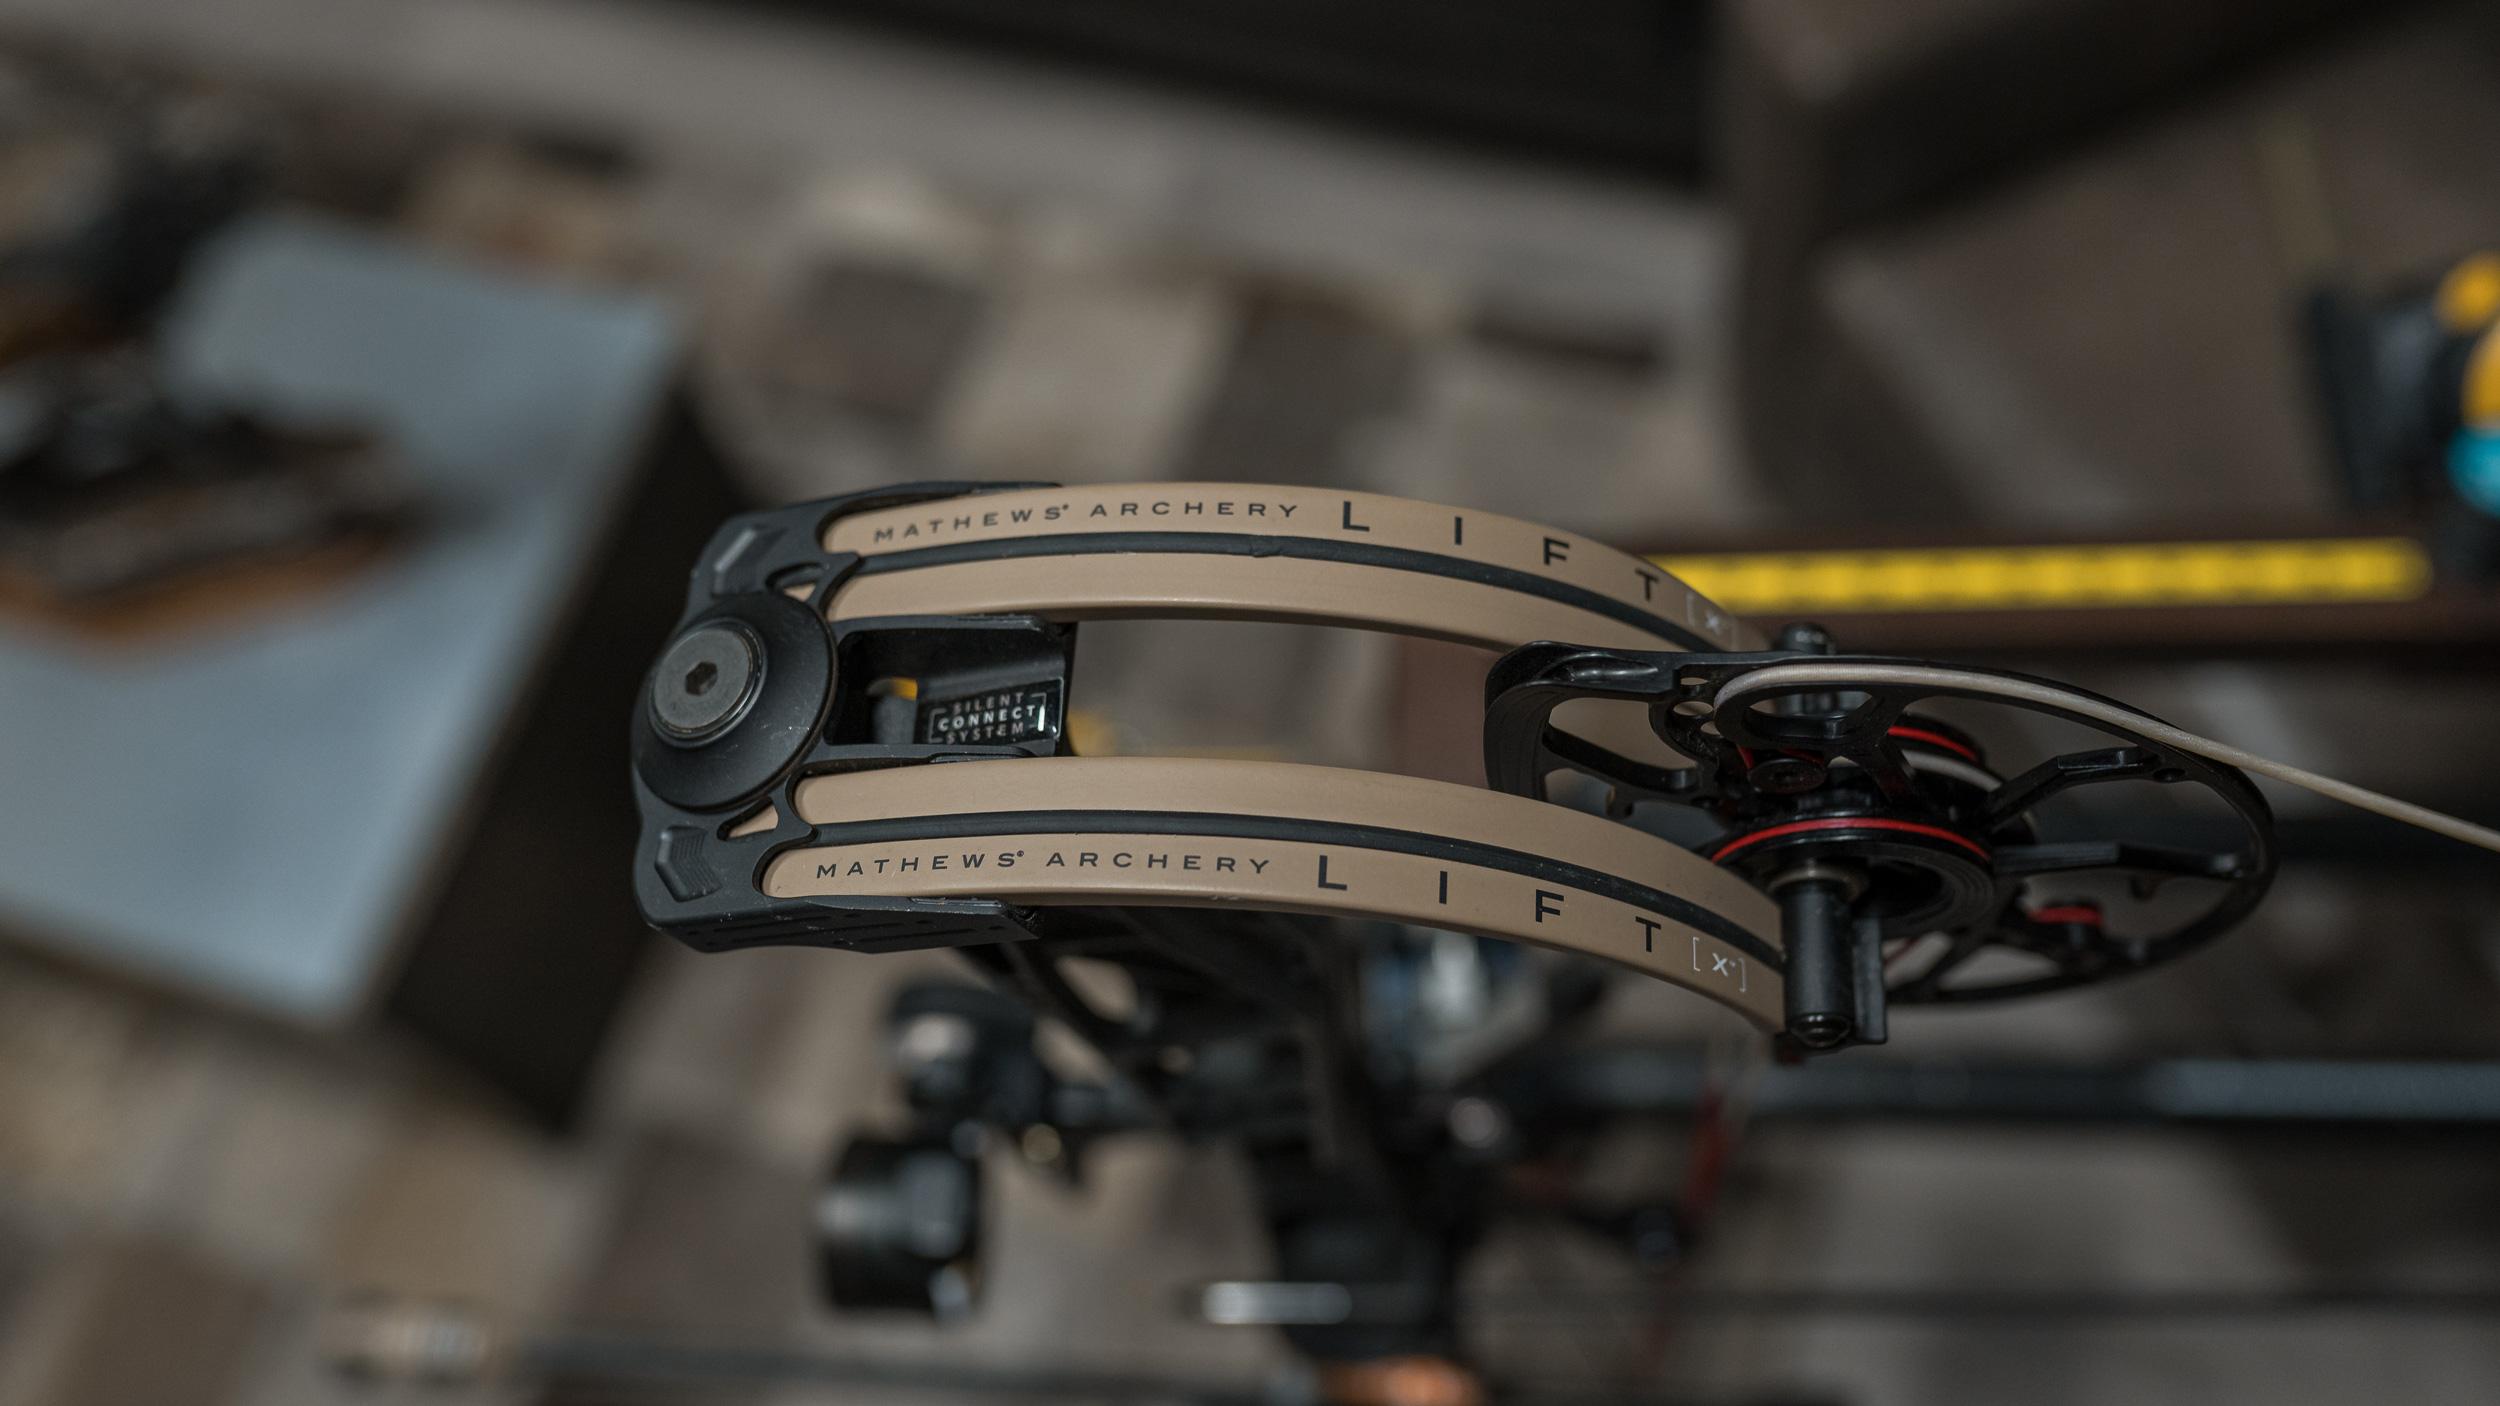
Mathews Lift X on a draw board.
Action | Twisting cable |
|---|---|
Axle to axle length | Decrease |
Brace height | Increase |
Action | Untwisting cable |
Axle to axle length | Increase |
Brace height | Decrease |
Action | Twisting string |
Axle to axle length | Slightly decrease |
Brace height | Slightly increase |
Action | Untwisting string |
Axle to axle length | Slightly increase |
Brace height | Slightly decrease |
Action | Axle to axle length | Brace height |
|---|---|---|
Twisting cable | Decrease | Increase |
Untwisting cable | Increase | Decrease |
Twisting string | Slightly decrease | Slightly increase |
Untwisting string | Slightly increase | Slightly decrease |
Action | Twisting cable |
|---|---|
Draw weight | Increase |
Let-off | Decrease |
Action | Untwisting cable |
Draw weight | Decrease |
Let-off | Increase |
Action | Twisting string |
Draw weight | Slightly decrease |
Let-off | Slightly increase |
Action | Untwisting string |
Draw weight | Slightly increase |
Let-off | Slightly decrease |
Action | Draw weight | Let-off |
|---|---|---|
Twisting cable | Increase | Decrease |
Untwisting cable | Decrease | Increase |
Twisting string | Slightly decrease | Slightly increase |
Untwisting string | Slightly increase | Slightly decrease |
Proper cam timing on the upper bow cam.
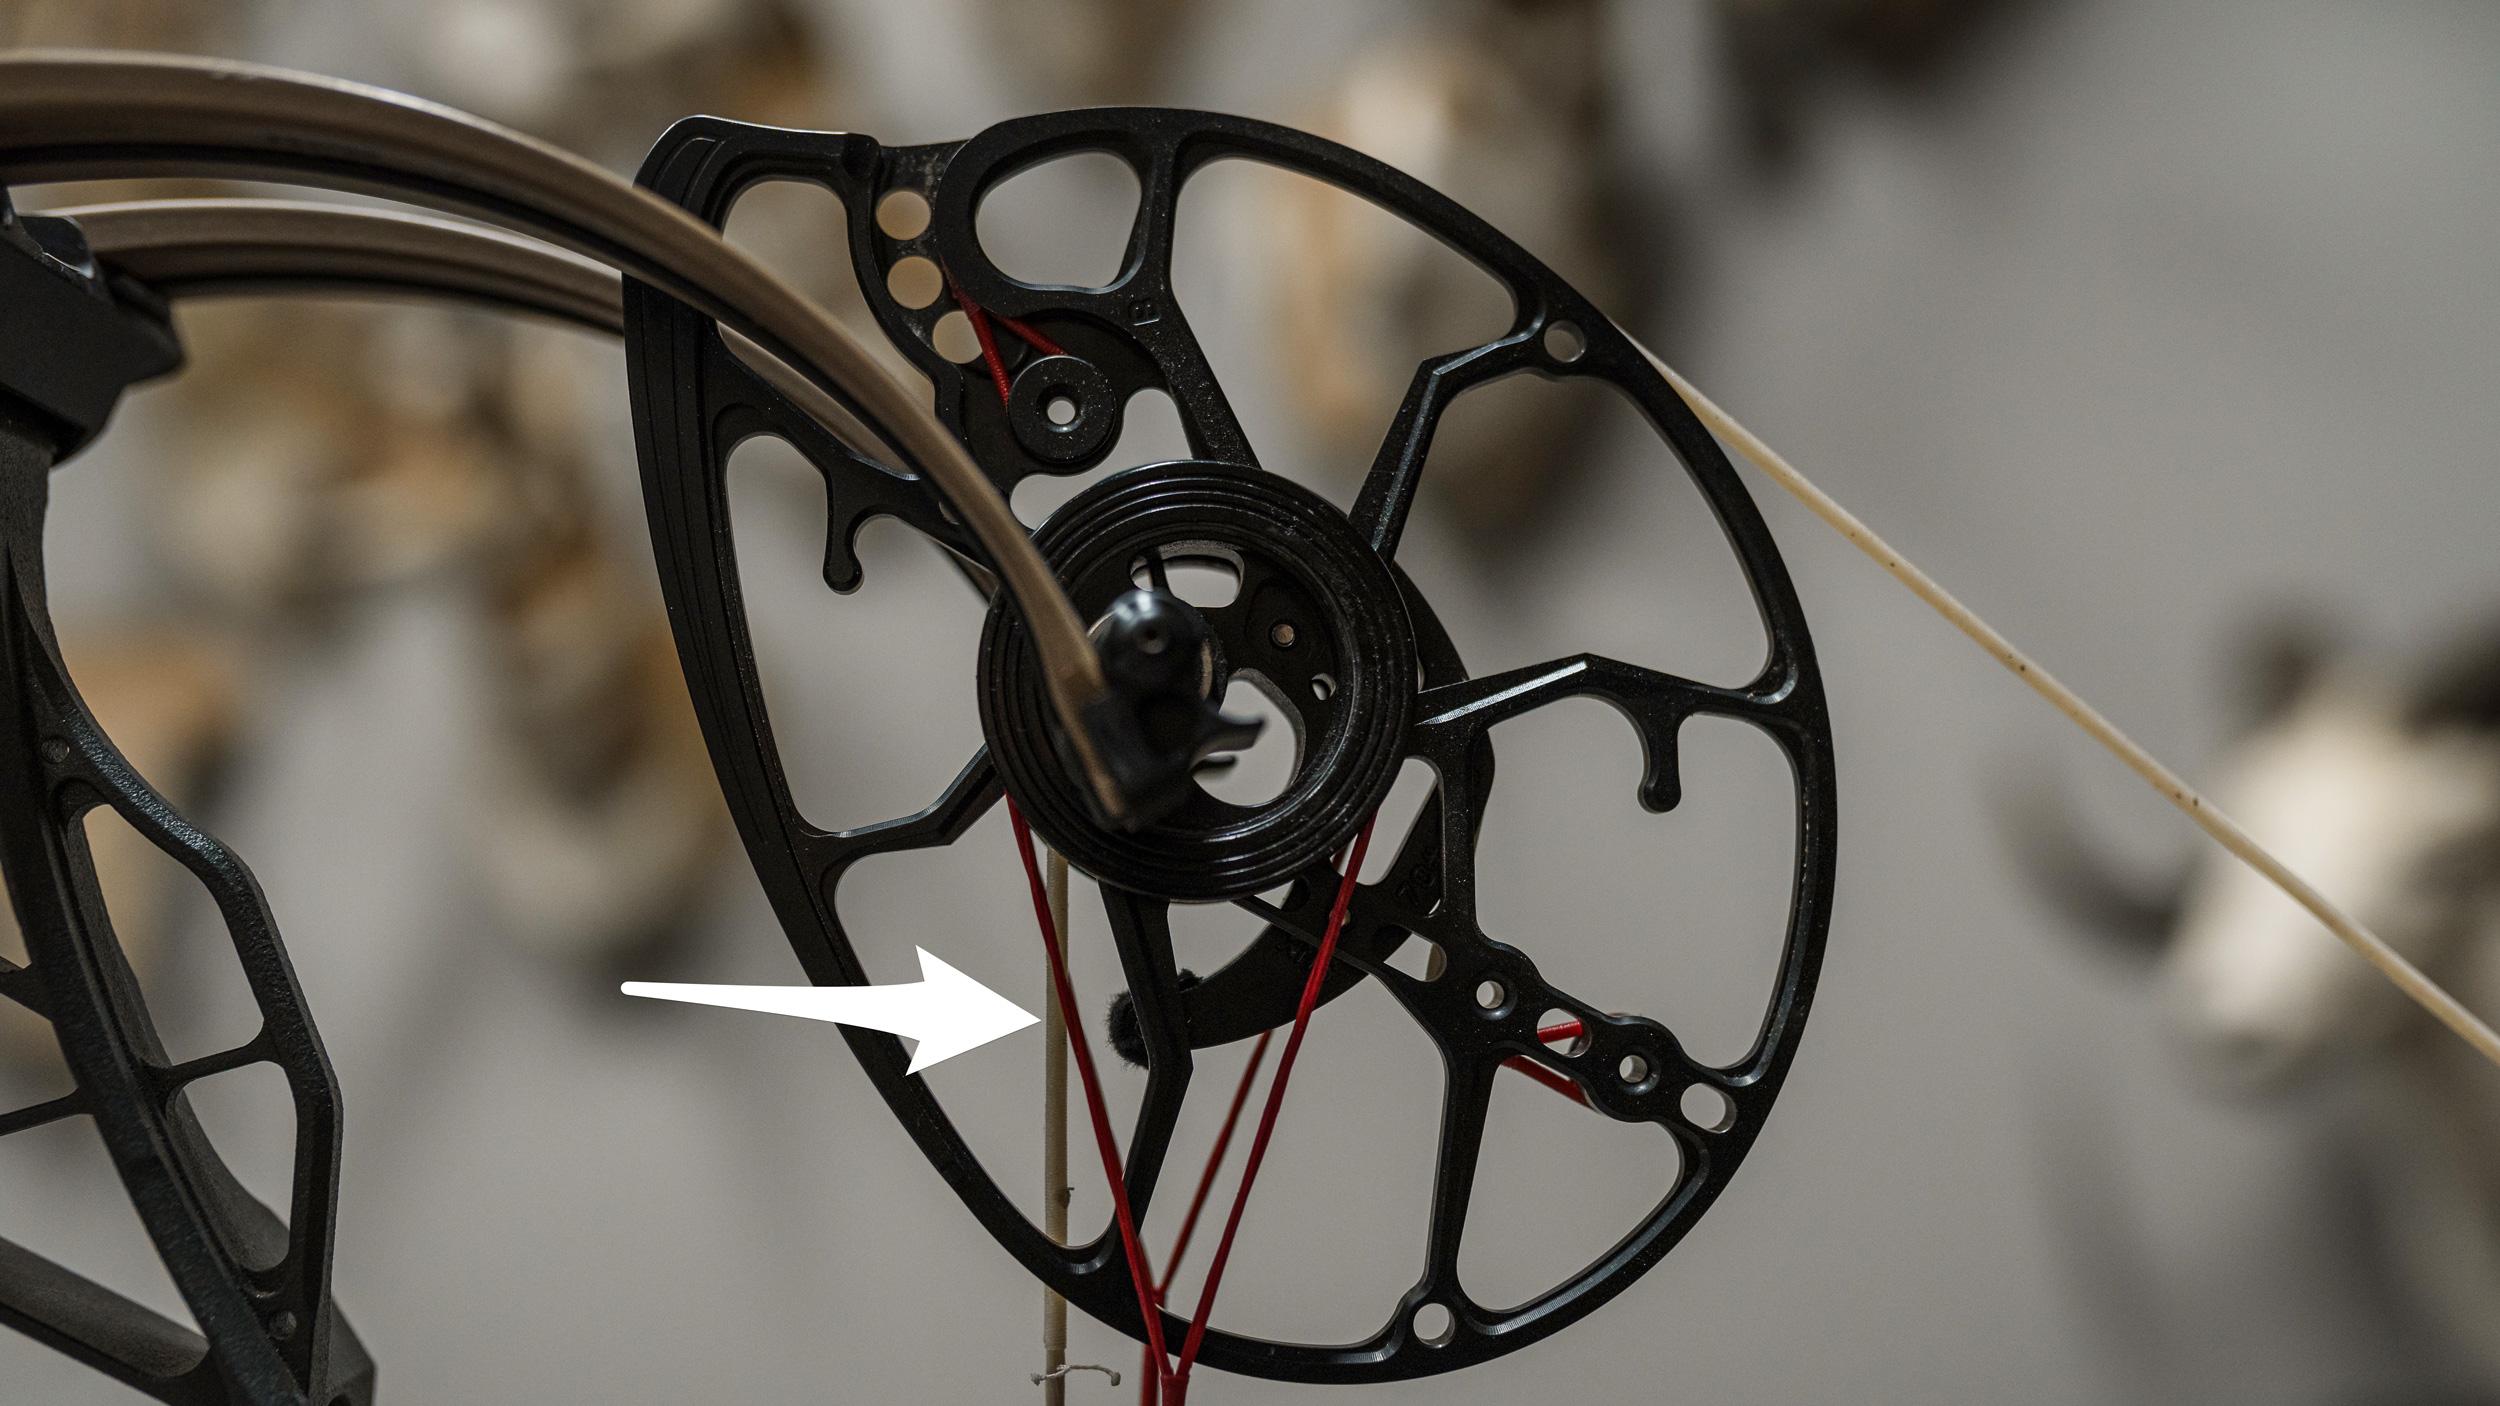
In this example, the top bow cam is out of time and under-rotated.
Problem | Top cam draw stop hits first |
|---|---|
Cable (fix) | Add twist(s) to top cam cable or take twist(s) out of bottom cam cable |
String (fix) | Take twist(s) out |
Problem | Bottom cam draw stop hits first |
Cable (fix) | Add twist(s) to bottom cam cable or take twist(s) out of top cam cable |
String (fix) | Add twist(s) |
Problem | Cable (fix) | String (fix) |
|---|---|---|
Top cam draw stop hits first | Add twist(s) to top cam cable or take twist(s) out of bottom cam cable | Take twist(s) out |
Bottom cam draw stop hits first | Add twist(s) to bottom cam cable or take twist(s) out of top cam cable | Add twist(s) |
Action | Arrow length: cut shorter |
|---|---|
Impact on arrow spine | Stiffens spine |
Action | Arrow length: longer |
Impact on arrow spine | Weakens spine |
Action | Insert weight: increase |
Impact on arrow spine | Weakens spine |
Action | Point weight: increase |
Impact on arrow spine | Weakens spine |
Action | Fletching weight: increased |
Impact on arrow spine | Stiffens spine |
Action | Nock weight: increased |
Impact on arrow spine | Stiffens spine |
Action | Wrap |
Impact on arrow spine | Stiffens spine |
Action | Draw weight: increase |
Impact on arrow spine | Weakens spine |
Action | Draw weight: decrease |
Impact on arrow spine | Stiffens spine |
Action | Impact on arrow spine |
|---|---|
Arrow length: cut shorter | Stiffens spine |
Arrow length: longer | Weakens spine |
Insert weight: increase | Weakens spine |
Point weight: increase | Weakens spine |
Fletching weight: increased | Stiffens spine |
Nock weight: increased | Stiffens spine |
Wrap | Stiffens spine |
Draw weight: increase | Weakens spine |
Draw weight: decrease | Stiffens spine |
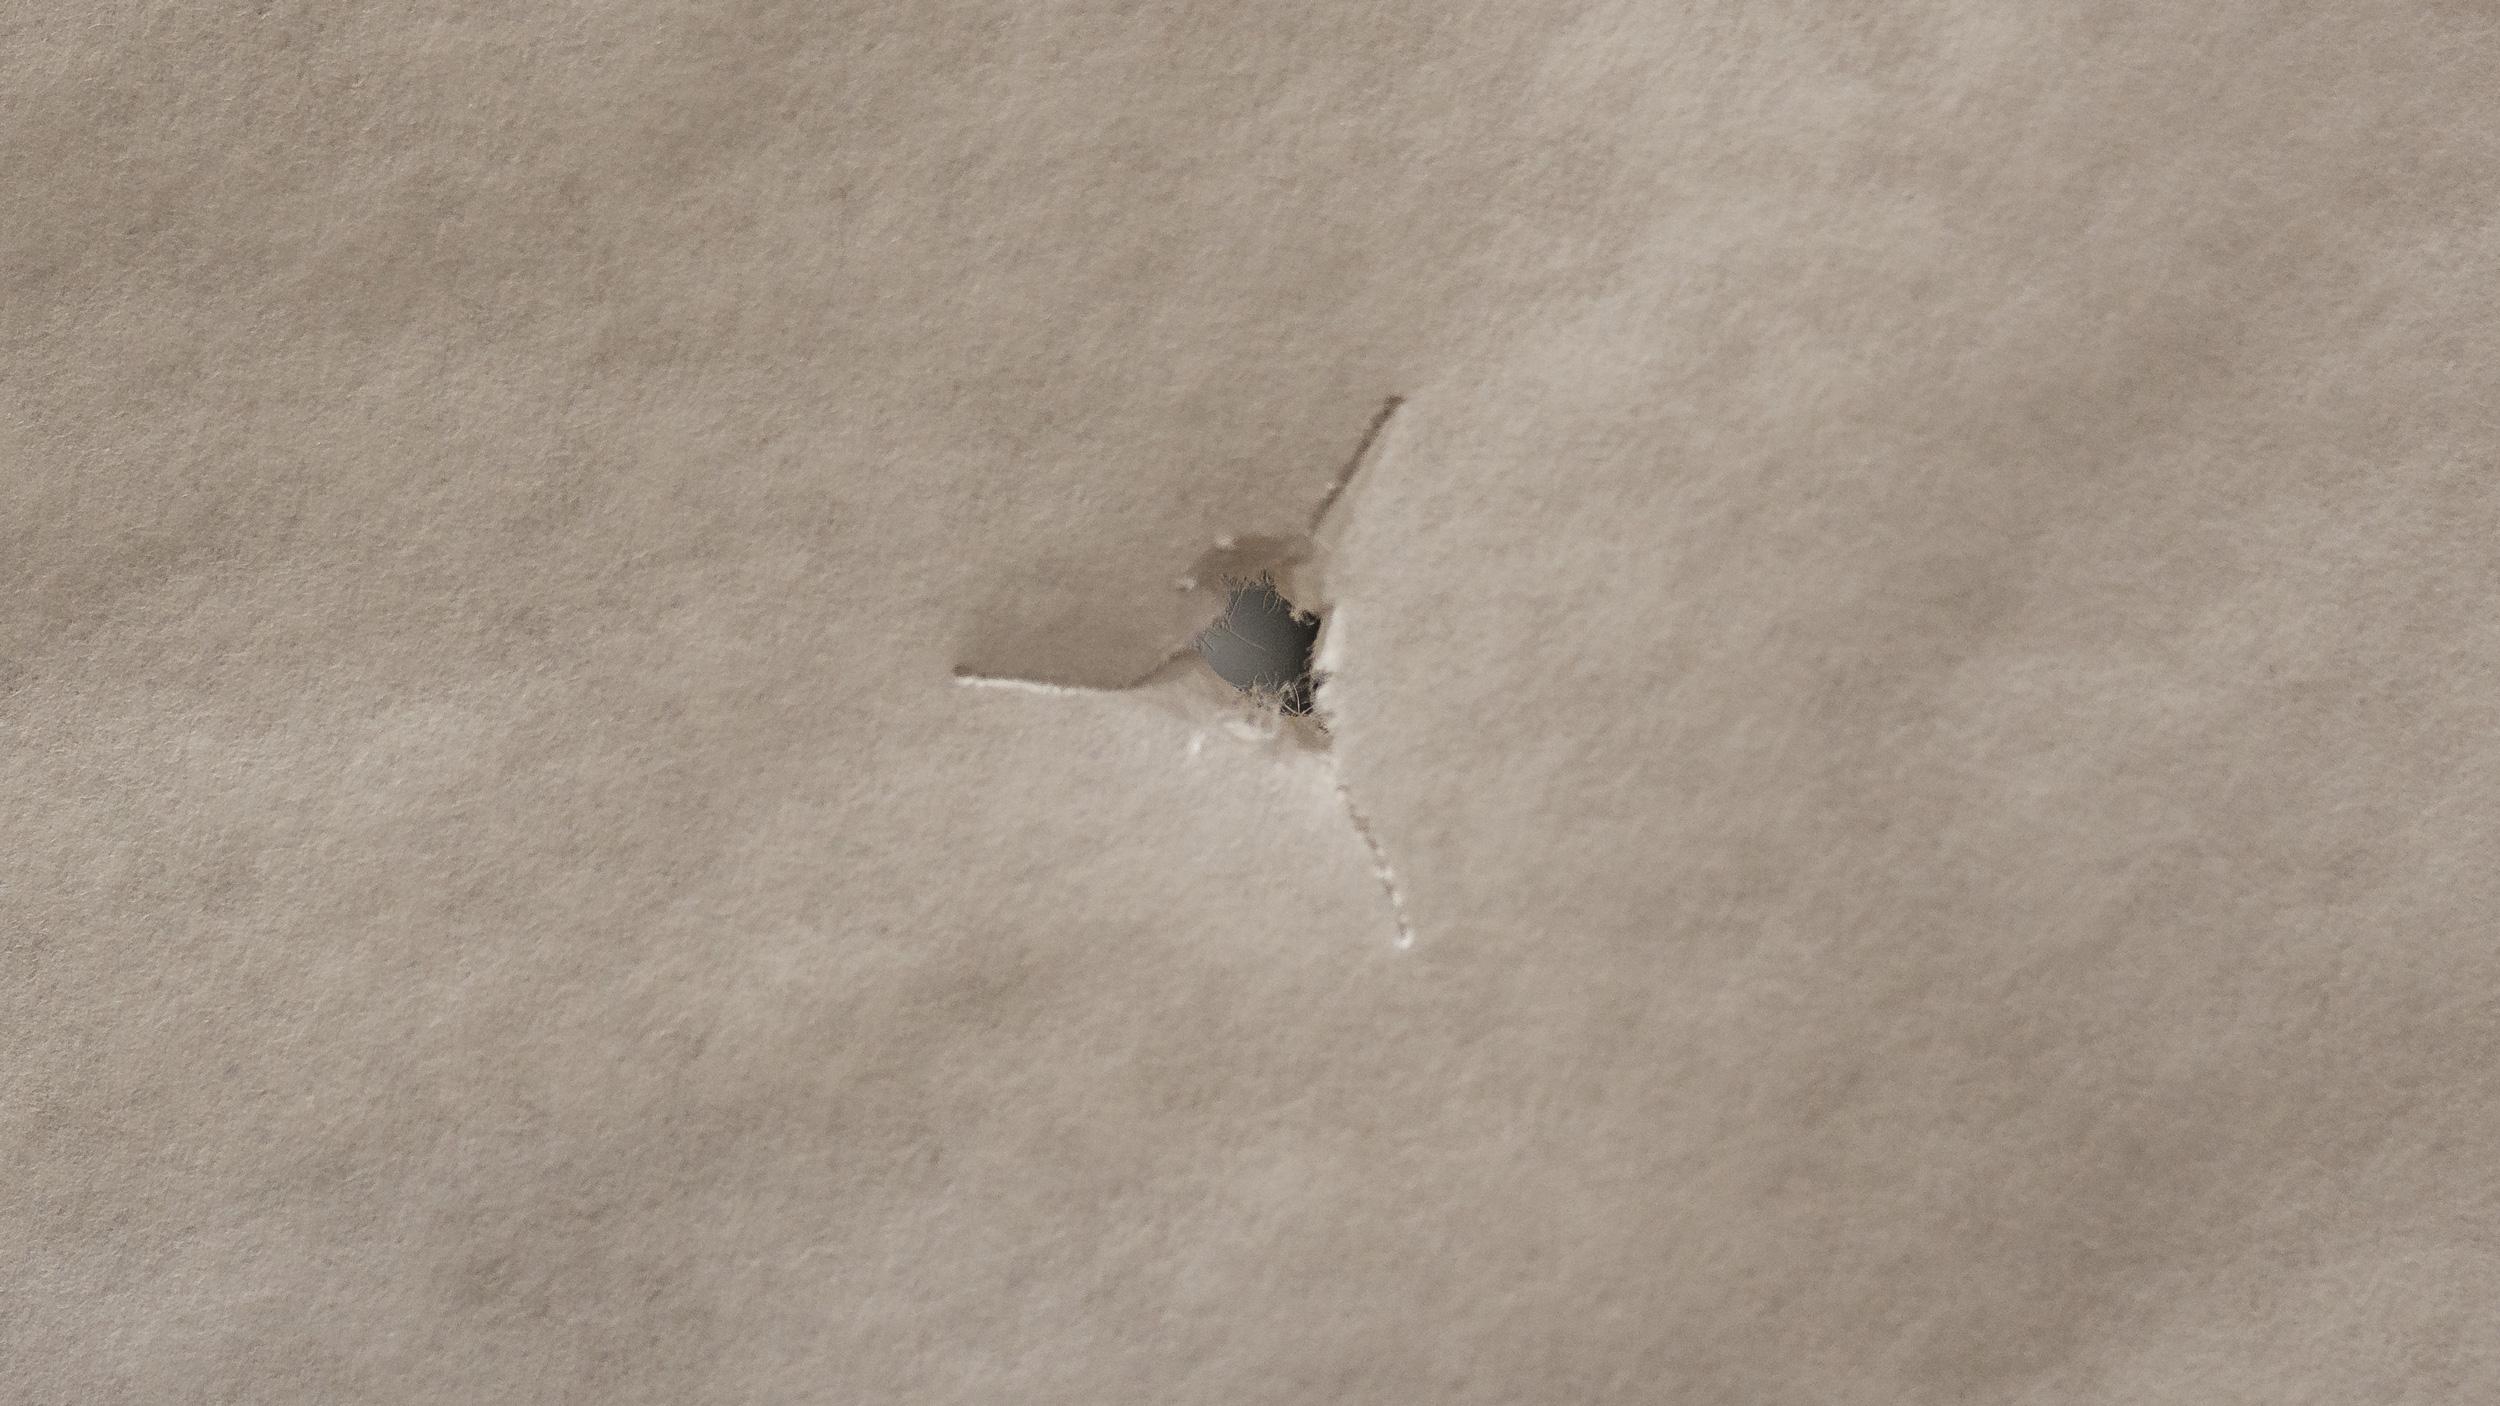
A perfect bullet hole when paper tuning a bow.
Issue | Nock tear high |
|---|---|
Rest | Move rest up |
Nock point | Move nock point down |
Cams | Twist top cam cable |
Arrow spine | Too weak |
Issue | Nock tear low |
Rest | Move rest down |
Nock point | Move nock point up |
Cams | Twist bottom cam cable |
Arrow spine | Too stiff |
Issue | Nock tear left |
Rest | Move rest toward right |
Nock point | - |
Cams | Move cams left |
Arrow spine | Too weak (right-handed) |
Issue | Nock tear right |
Rest | Move rest left |
Nock point | - |
Cams | Move cams right |
Arrow spine | Too stiff (right-handed) |
Issue | Rest | Nock point | Cams | Arrow spine |
|---|---|---|---|---|
Nock tear high | Move rest up | Move nock point down | Twist top cam cable | Too weak |
Nock tear low | Move rest down | Move nock point up | Twist bottom cam cable | Too stiff |
Nock tear left | Move rest toward right | - | Move cams left | Too weak (right-handed) |
Nock tear right | Move rest left | - | Move cams right | Too stiff (right-handed) |
Bare shaft tuning.
Issue | Bare shafts left of fletched shafts |
|---|---|
Rest | Move rest left |
Cams | Move cams right |
Issue | Bare shafts right of fletched shafts |
Rest | Move rest right |
Cams | Move cams left |
Issue | Bare shafts high of fletched shafts |
Rest | Move rest down |
Cams | Add twist(s) to top cam cable or remove twist from bottom cam cable |
Issue | Bare shafts low of fletched shafts |
Rest | Move rest up |
Cams | Add twist(s) to bottom cam cable or remove twist(s) from top cam cable |
Issue | Rest | Cams |
|---|---|---|
Bare shafts left of fletched shafts | Move rest left | Move cams right |
Bare shafts right of fletched shafts | Move rest right | Move cams left |
Bare shafts high of fletched shafts | Move rest down | Add twist(s) to top cam cable or remove twist from bottom cam cable |
Bare shafts low of fletched shafts | Move rest up | Add twist(s) to bottom cam cable or remove twist(s) from top cam cable |
Issue | Broadheads impact left |
|---|---|
Rest | Move rest left |
Cams | Move cams right |
Issue | Broadheads impact right |
Rest | Move rest right |
Cams | Move cams left |
Issue | Broadheads impact high |
Rest | Move rest down |
Cams | Add twist(s) to top cam cable or remove twist from bottom cam cable |
Issue | Broadheads impact low |
Rest | Move rest up |
Cams | Add twist(s) to bottom cam cable or remove twist(s) from top cam cable |
Issue | Rest | Cams |
|---|---|---|
Broadheads impact left | Move rest left | Move cams right |
Broadheads impact right | Move rest right | Move cams left |
Broadheads impact high | Move rest down | Add twist(s) to top cam cable or remove twist from bottom cam cable |
Broadheads impact low | Move rest up | Add twist(s) to bottom cam cable or remove twist(s) from top cam cable |
In this article, I dive into how I tune my bow and arrow setup before I head out on a hunt. Having a well-tuned bow is important for accuracy, penetration, and, ultimately, your confidence. I’ll also offer tips and tricks that can help you troubleshoot issues you may be having. Basically, we owe it to the game we pursue to do all that we can prior to a hunt to ensure we make the most lethal shot that we can, and having a well-tuned bow and arrow is a large portion of that equation.
I recently recorded a podcast on bow tuning, which you can find wherever you get your podcasts.
Before I dive into “tuning” my bow and arrow, there are a few things I should note, including draw length, draw weight, D-loop/nocking point location, peep height and arrow spine/dynamic arrow spine.
Draw length is critical to accuracy — perhaps the most critical component of accuracy to be honest. To explore your personal draw length, stand naturally with your back against a wall, extend your arms out (like a “T” shape), palms facing forward and have someone measure your wingspan from the tip of your middle finger to the other. Take that number and divide it by 2.5. So for example, a wingspan of 70” divided by 2.5 equates to a 28” draw length.
This is a decent starting point; however, you may require some fine-tuning to find what is the most repeatable and stable draw length, but, generally speaking, it’s a great starting point. It’s also important at this time that I touch on form and anchor point. Before diving into those, I should note that everyone is different and there is not a hard rule on what perfect form should be. There are generalities that I believe make good sense, but the overall goal is to feel comfortable, aim well, and accurately hit the spot you are aiming at, and there are many factors that go into that. I’ll include good practices, but pay attention to your own journey and don’t be afraid to tinker with things to find what works for you.
First, stand up straight over your hips. Stance should be comfortable and stable, not too narrow, not too wide; just stand up straight over your hips in a manner that provides you a stable base where you aren’t prone to leaning forward or back, or where your weight is disproportionately distributed to one foot or the other. Stance can be somewhat open, with your foot closest to the target slightly open to it. I find that this type of stance is more comfortable and stable and it keeps me from feeling like I am rocking forward or back when at full draw. Keep your upper body in a clean straight line going up your spine, your neck and head. Your shoulders should be vertically aligned over your hips; your hips over your feet. As you arrive at full draw, your bow arm should be extended out straight, your shoulder joint sitting low “in the pocket.” Once again, it shouldn’t be forced too high or low. Just let it sit comfortably in the pocket. Bow arm alignment should be straight, not locked out with tension in the muscles, but straight bone on bone alignment. An example worth noting: if you were to extend your arm out and lean into a door jam, you can hold your weight a very long time with a straight arm; whereas, if you bend it, you are engaging the muscles to hold your weight and muscles over time begin to fatigue and shake. Your bow arm when holding your bow at full draw is no different. A relaxed straight alignment will allow you to hold more stable for a longer period of time.
When you arrive at full draw, with your bow arm and stance as described above, the bowstring should be at the tip of your nose and the corner of your mouth — or close to it. You should be able to feel those lightly contacting at those two points without having your bow arm feel like it’s overextended or that it’s collapsing. You also should not feel like you have to dip or move your head forward or back to make those light contact points with the bowstring. Your drawing arm should be in a position where the length of the forearm is in alignment straight through the length of the arrow (if viewed from behind or above).
To reiterate, the draw length should feel repeatable and comfortable. You should feel comfortable and stable at full draw. If it feels like you are fighting or straining to maintain your form at full draw, consider evaluating your draw length. One final tip: once you begin to shoot your bow more you can pay more attention to how the bow aims. If you are aiming and the pin movement is tight, but more rapidly dancing around, it may indicate that the draw length is too short. Conversely, if the pin movement is slower, but more widely floating in a larger pattern, it may indicate that the draw length is too long.
Some notes on draw weight and holding weight. Your draw weight is the maximum pounds the bow will reach at the peak of drawing. Common ranges are 50 to 60 pounds, 60 to 70 pounds and, more increasingly, 70 to 80 pounds. The most common draw weight for men is 60 to 70 pounds. The holding weight is the amount of pounds you will be holding at full draw. Common “let-off” percentages for bowhunters currently range from approximately 80% to 85%. This means a bow that has a draw weight of 70 pounds with 85% let-off will have approximately 10.5 pounds of holding weight. Bowhunters have some decisions to make in regards to draw weight and let-off. I suggest that bowhunters choose a draw weight that is relatively easy to draw no matter the conditions or shooting positions. Can you draw smoothly every single time when it’s cold or when you are in a kneeling or sitting position? Can you draw smoothly and easily every single time while shooting long practice sessions and maintain your comfortable shooting form? Does it strain you or hurt when you draw the bow? If it does, it shouldn’t and, if you can’t draw from every position arrow after arrow or in inclement weather, consider decreasing your draw weight. When it comes to let-off percentage, it’s a very personal choice. Higher let-off percentages would allow you to hold the bow at full draw for a longer period of time, which might be beneficial in real world hunting situations. Lower let-off percentages may offer you more stability, better aim and more accuracy up to a point because you are required to pull or build some tension into the back wall, which often offers more stability. Personally, I’d suggest 80% or playing with the let-off if your bow allows you to do so. Ultimately, I want a bow that I can draw quietly and smoothly with minimal movement from all positions and conditions. I also want the bow to be as stable as possible. In terms of priority, I rank stability and accuracy over ability to hold the bow for a longer period of time before my form and shot breaks down.
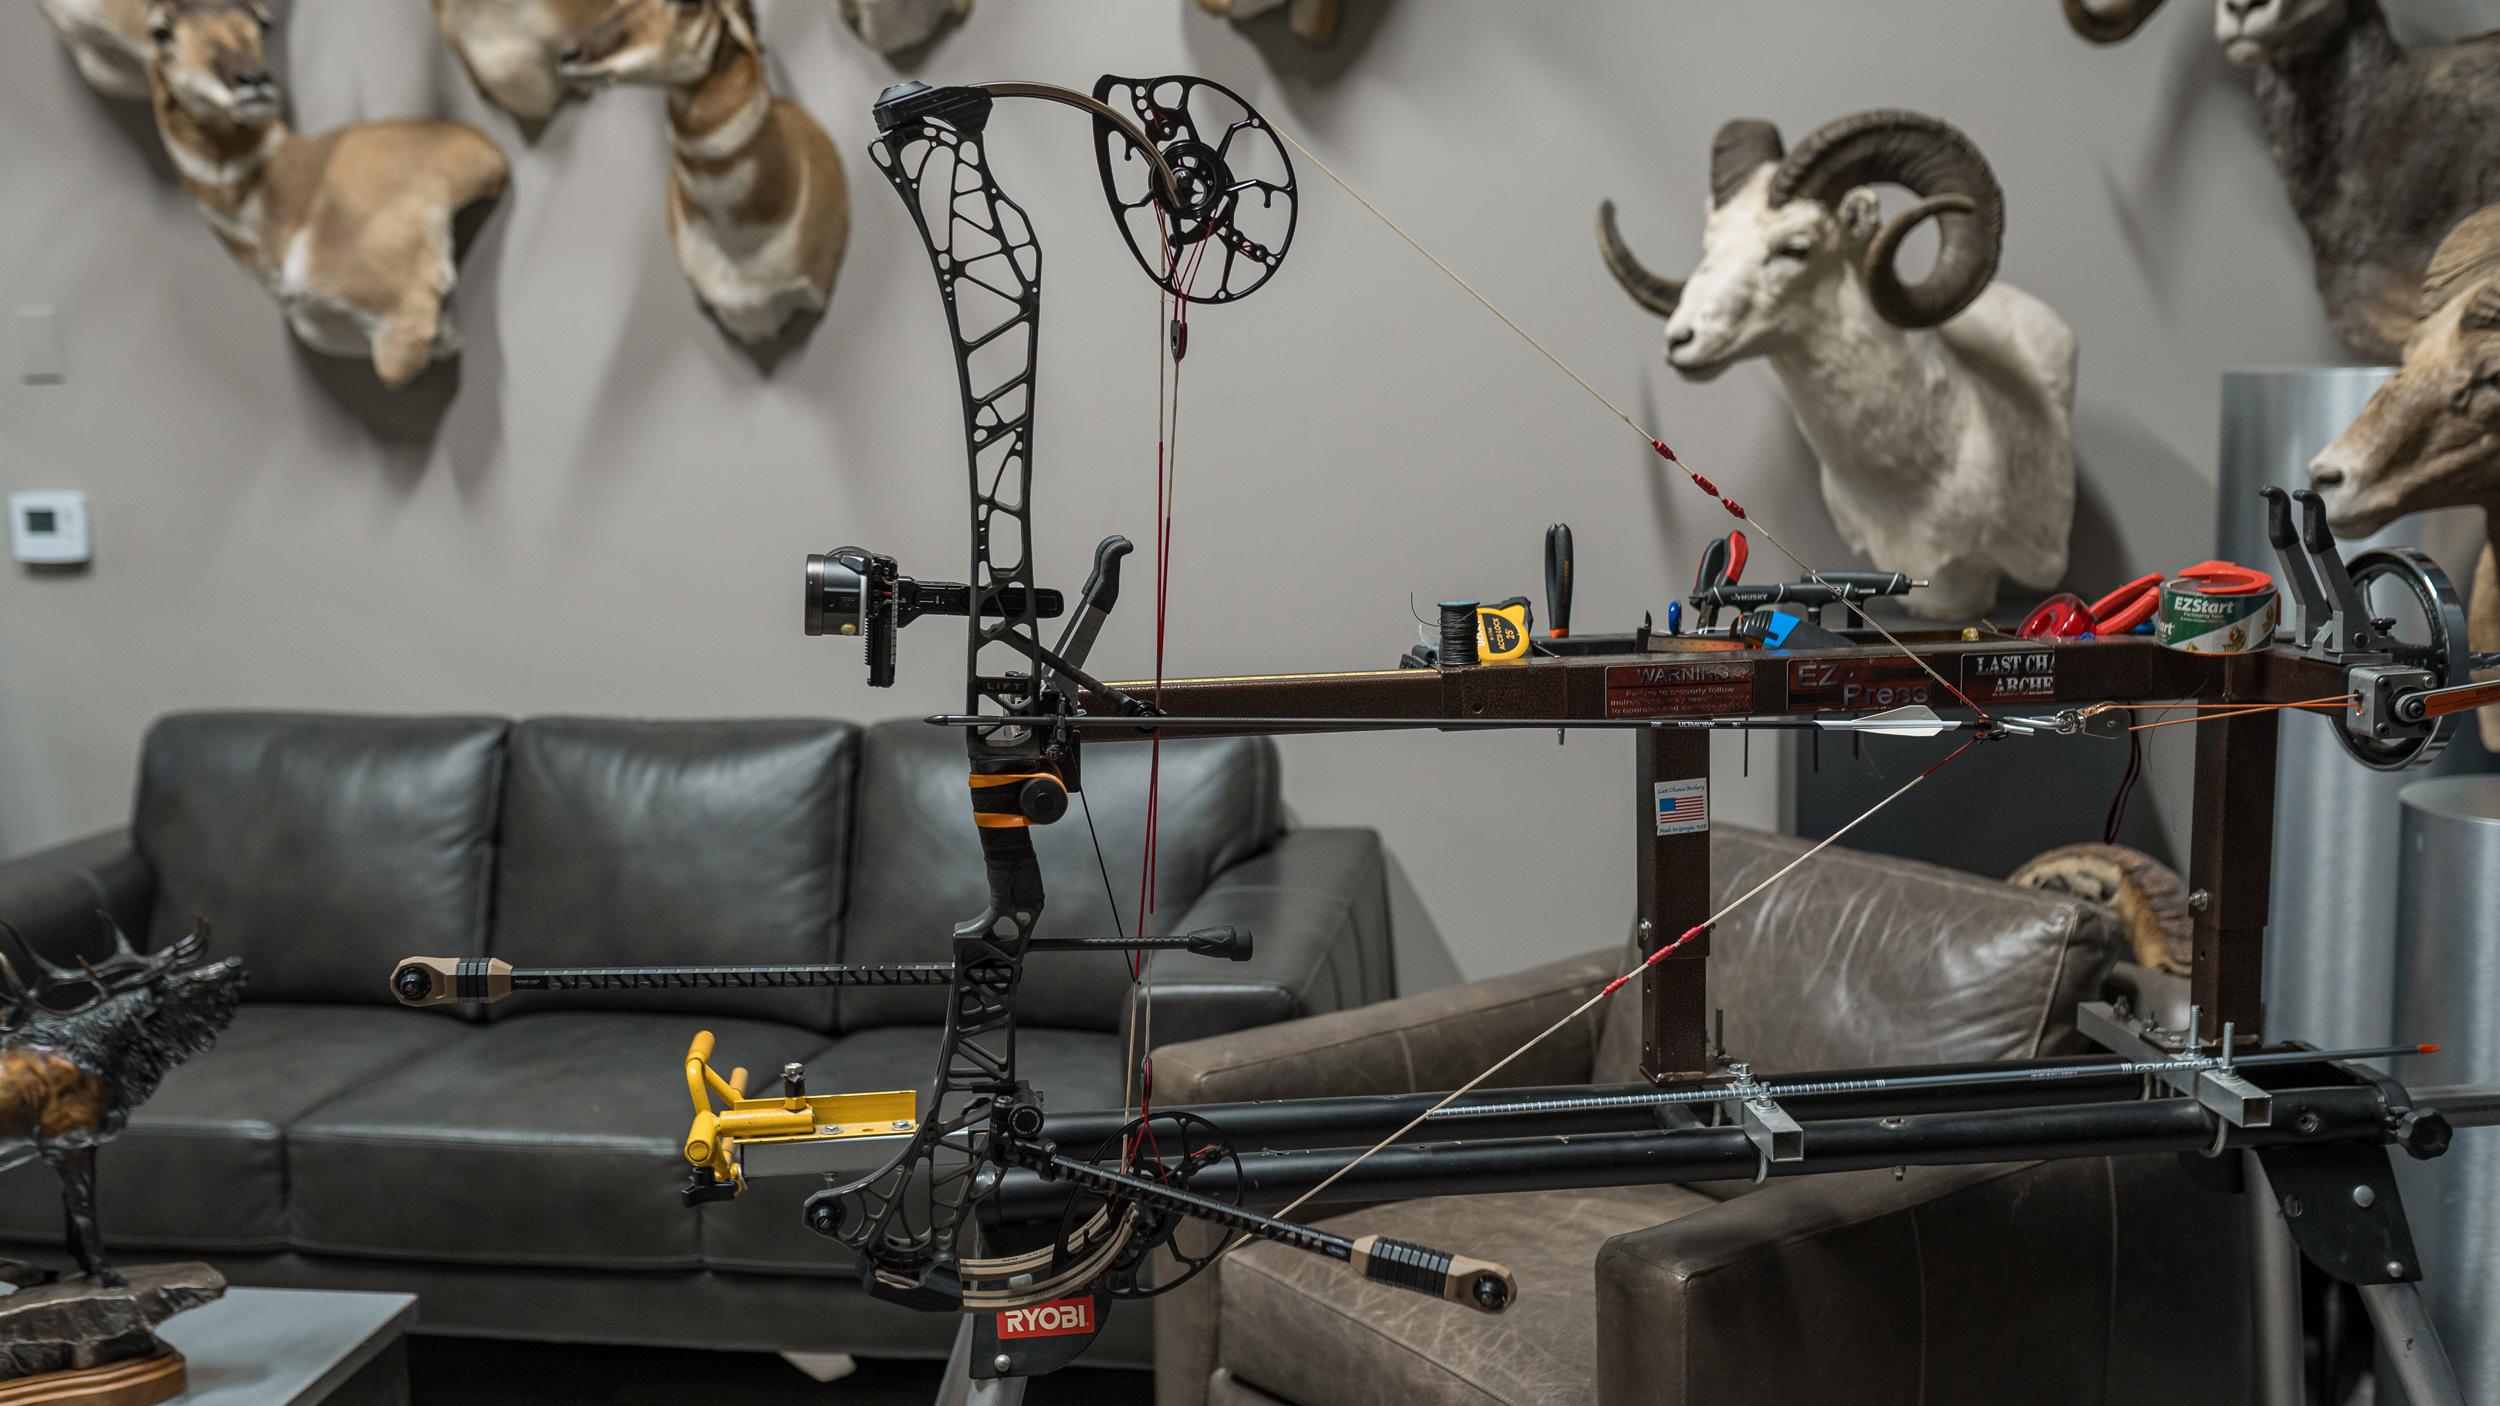
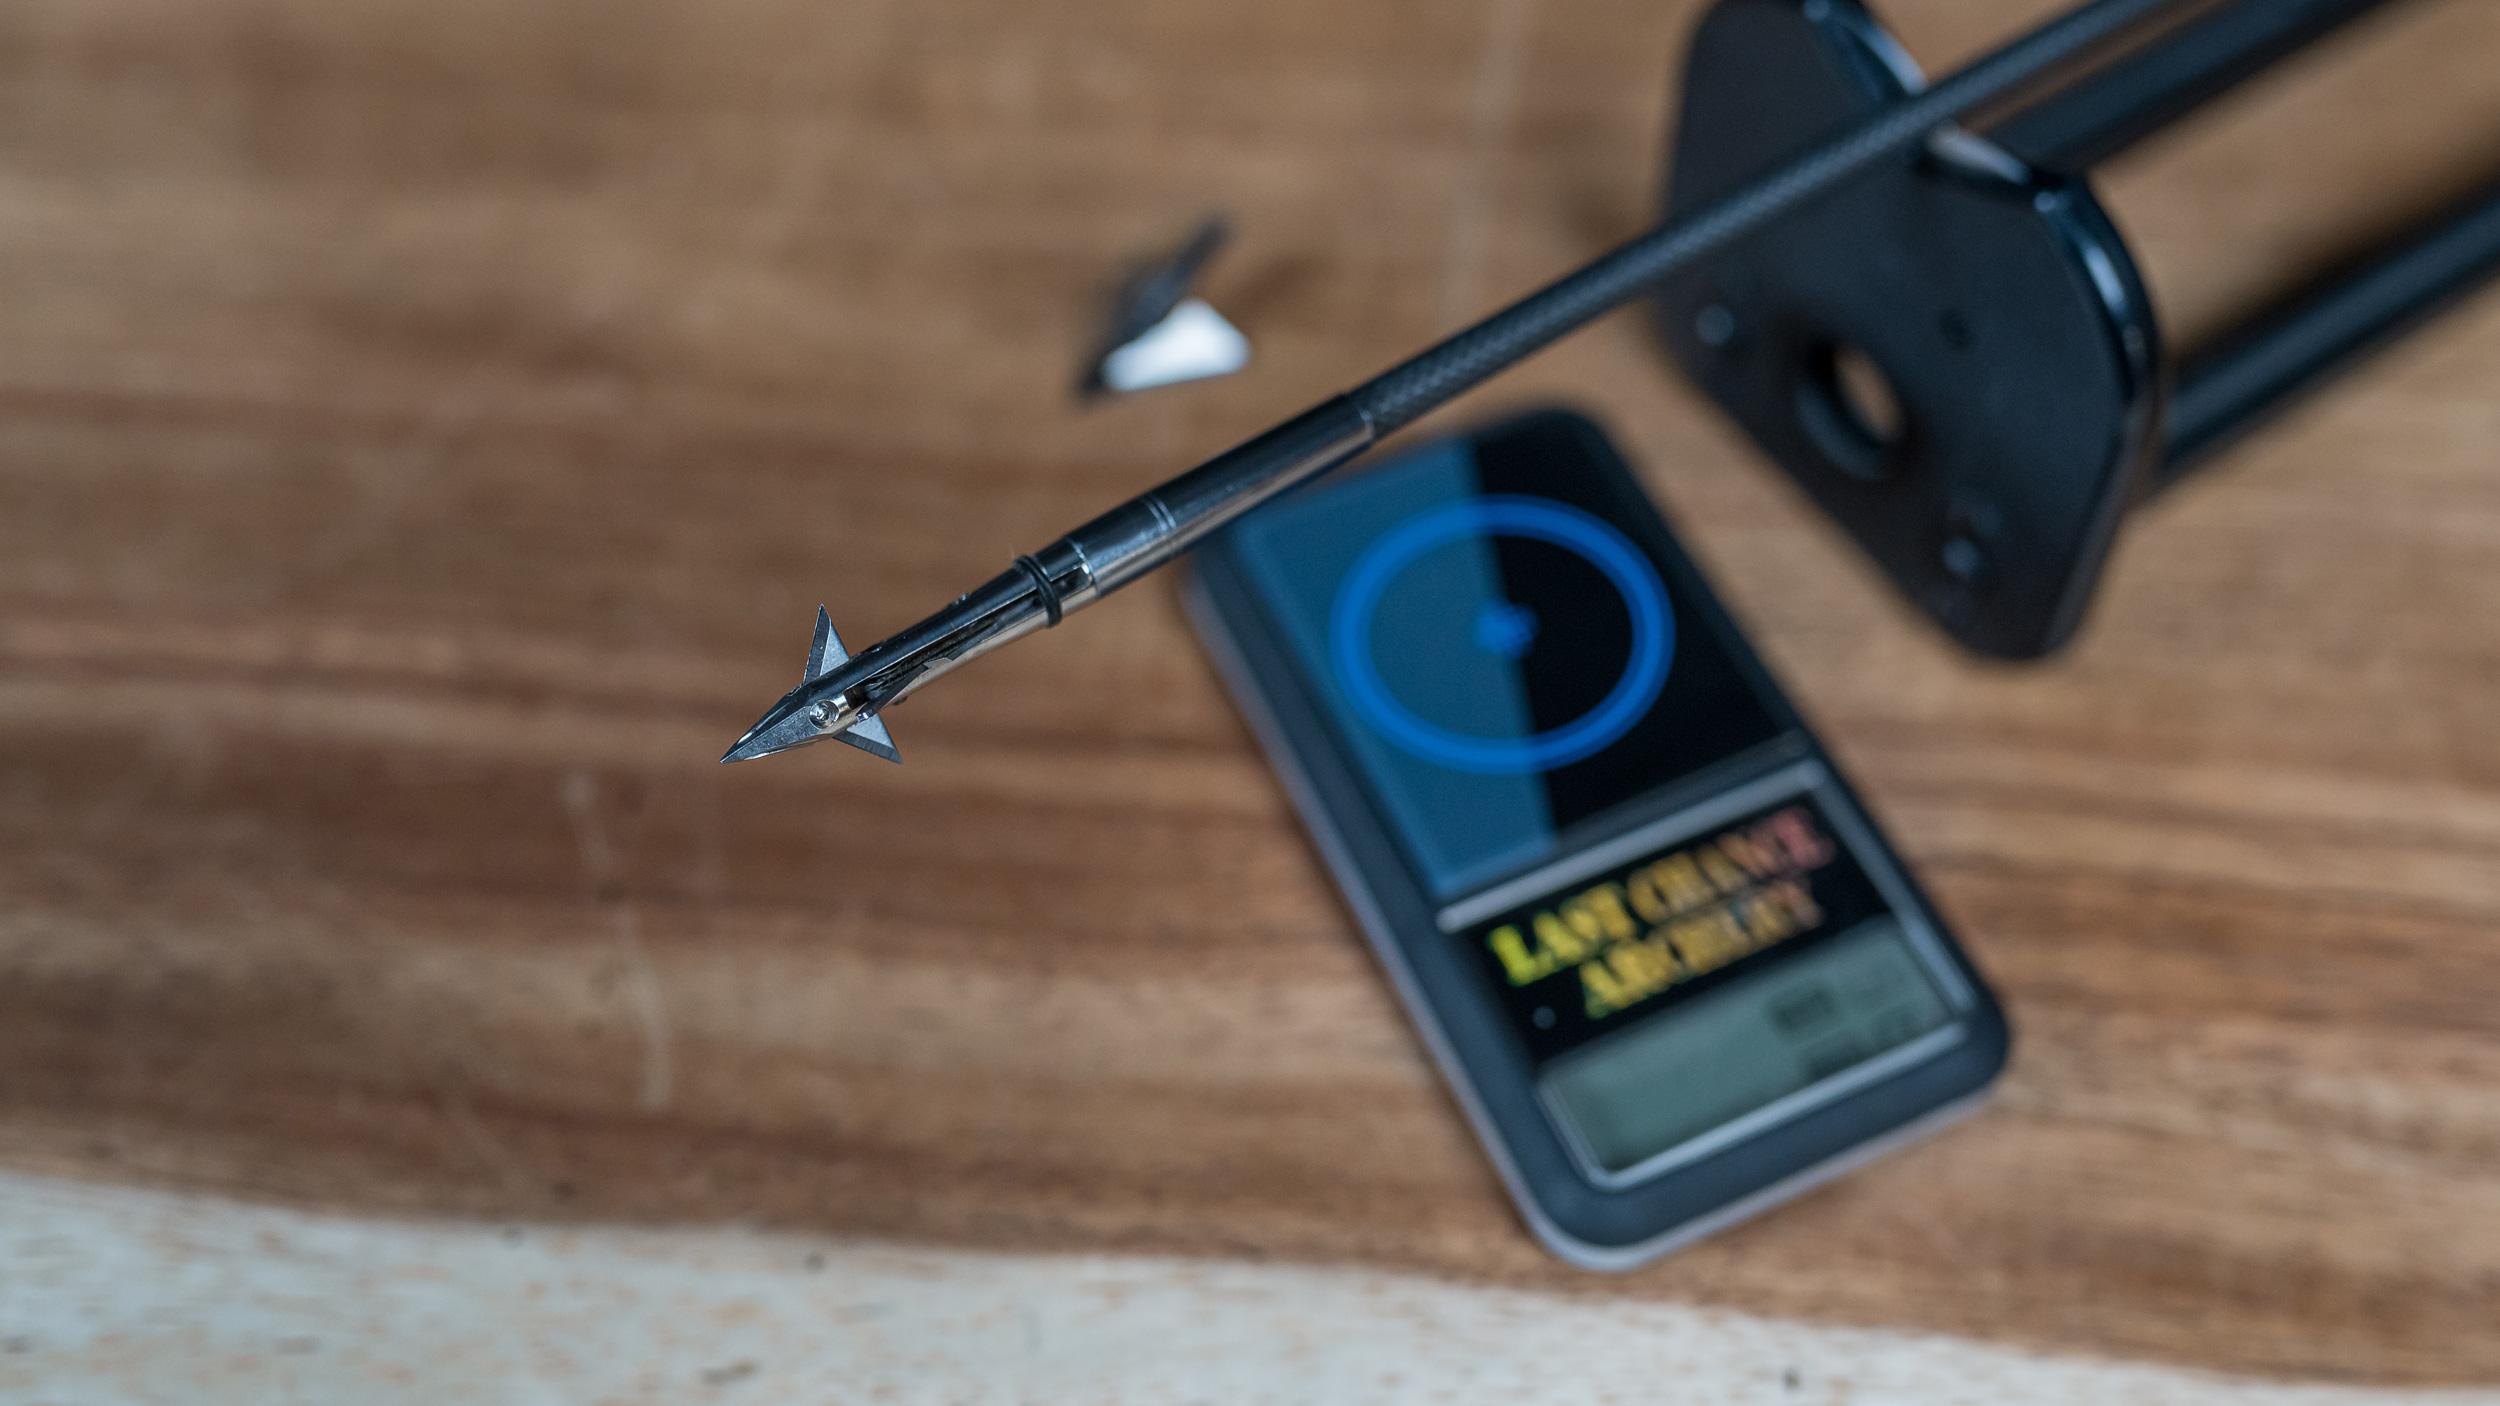
Before attaching any accessories, measure the axle to axle length, brace height and draw weight. With the limb bolts bottomed out, the axle to axle length can be measured from the center of the top cam axle to the center of the bottom cam axle on the shelf side of the bow. The brace height is the distance as measured from the deepest part of the grip to the inside edge of the bowstring. Draw weight will need to be measured with a tool like the Last Chance Bow Scale. The axle to axle length, brace height and draw weight should match the specifications as listed by the bow manufacturer. If the bow is brand new, it’s typically set to spec. If the bow is used, you are putting on new strings or if you are just rebuilding, you’ll want to match your axle to axle, brace height and draw weight to the factory specs. The most common issue is that the axle to axle will be too long, which will also shorten the brace height. The table below will help you know what to do to get the bow back into spec if it’s out. Start adjustments with your cables first. It would be a rare occasion to have to put more than three full twists in your cables, but, as a general rule, put one twist into the bowstring for every three twists you put in the cables.
After you have your bow’s axle to axle and brace height set to spec, I’d advise checking the bow’s draw weight. The draw weight should hit your maximum stated draw weight, meaning if the bow's limbs are 70 pounds, the draw weight should hit 70 pounds at a minimum. It’s not uncommon for a bow that is set to length specifications to have a draw weight that is a pound or two higher. If that is the case, you can take steps to reduce it if it’s an issue for you. If not, you can move on in the process. If the bow is below drawn weight, there are steps you can take and I’ll include another table below. One thing to remember is that a bow is a dynamic machine and a change to one aspect will change other aspects of the bow. It’s somewhat of a puzzle and knowing how one change impacts another is key to getting it to work as intended.
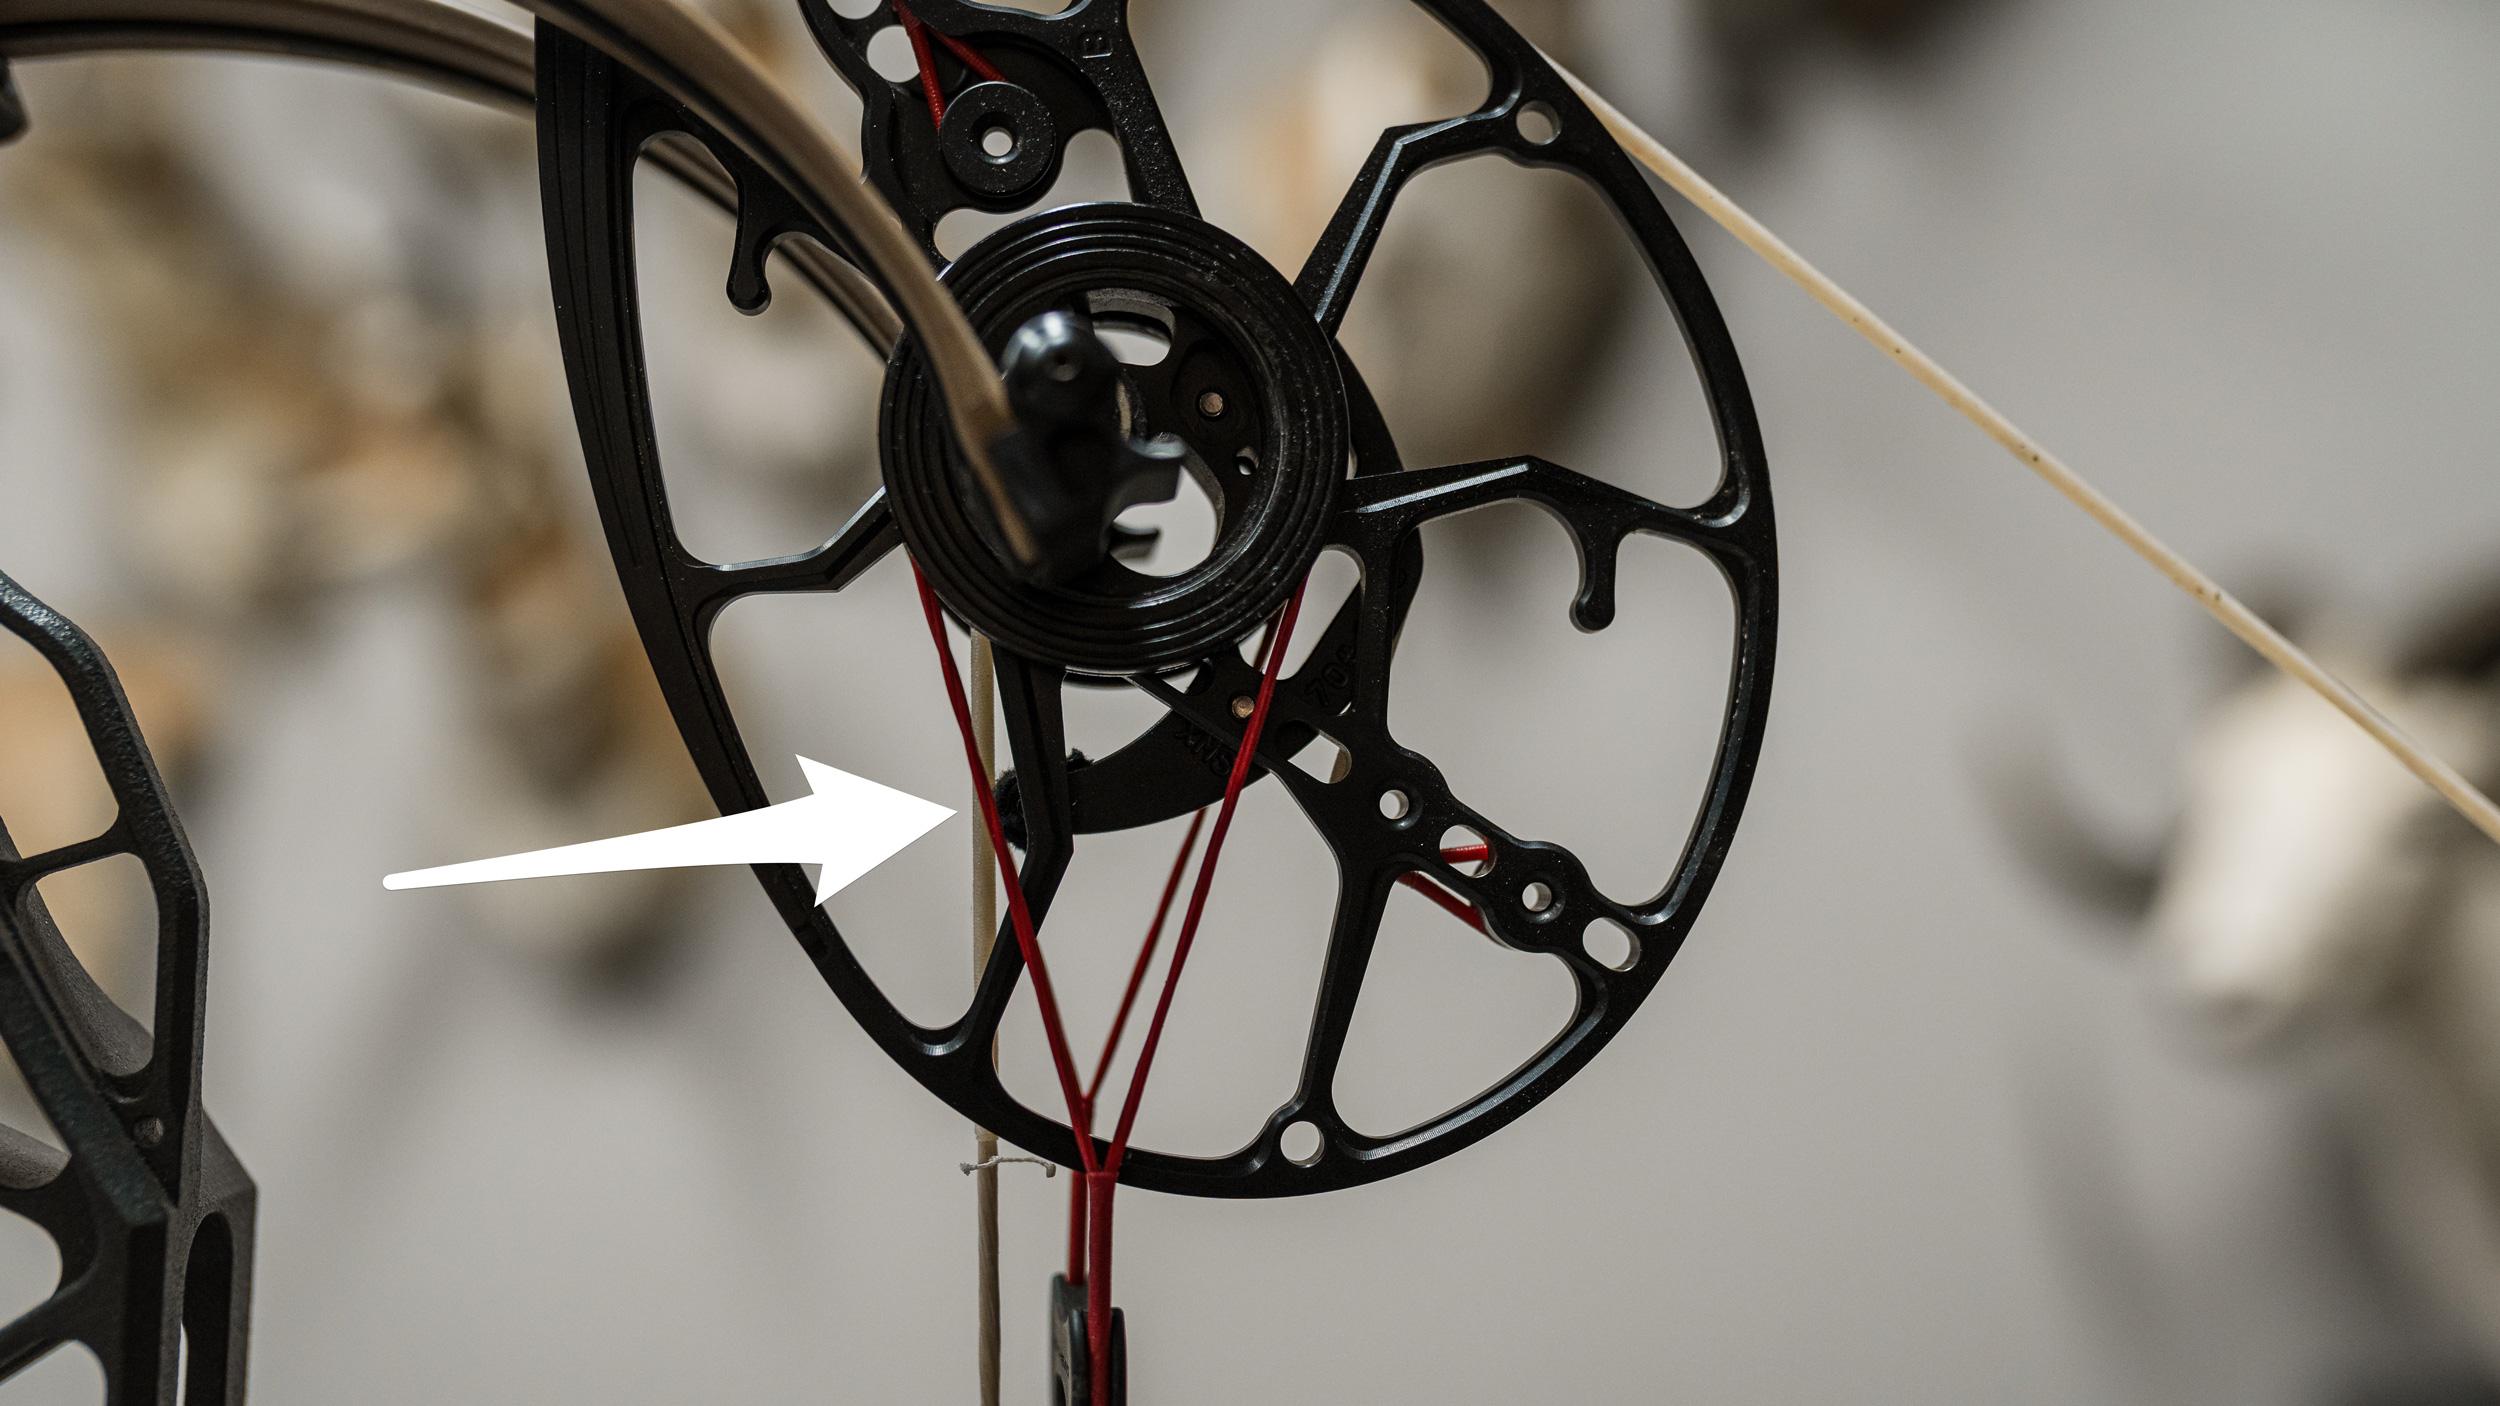
Before moving further into the setup process, check your cam timing to see if it’s relatively close. You will make finer adjustments later. Most modern bows have timing marks. For example, on a Mathews bow, there is a small hole on each cam where the cable will run through. The cables should be very close to the same location in relation to those timing holes in the cam. What this means is that as you draw the bow, the cams are rolling over at the same time, and the draw stops are contacting the cables or limbs (limb stop bow specific) at the same time.
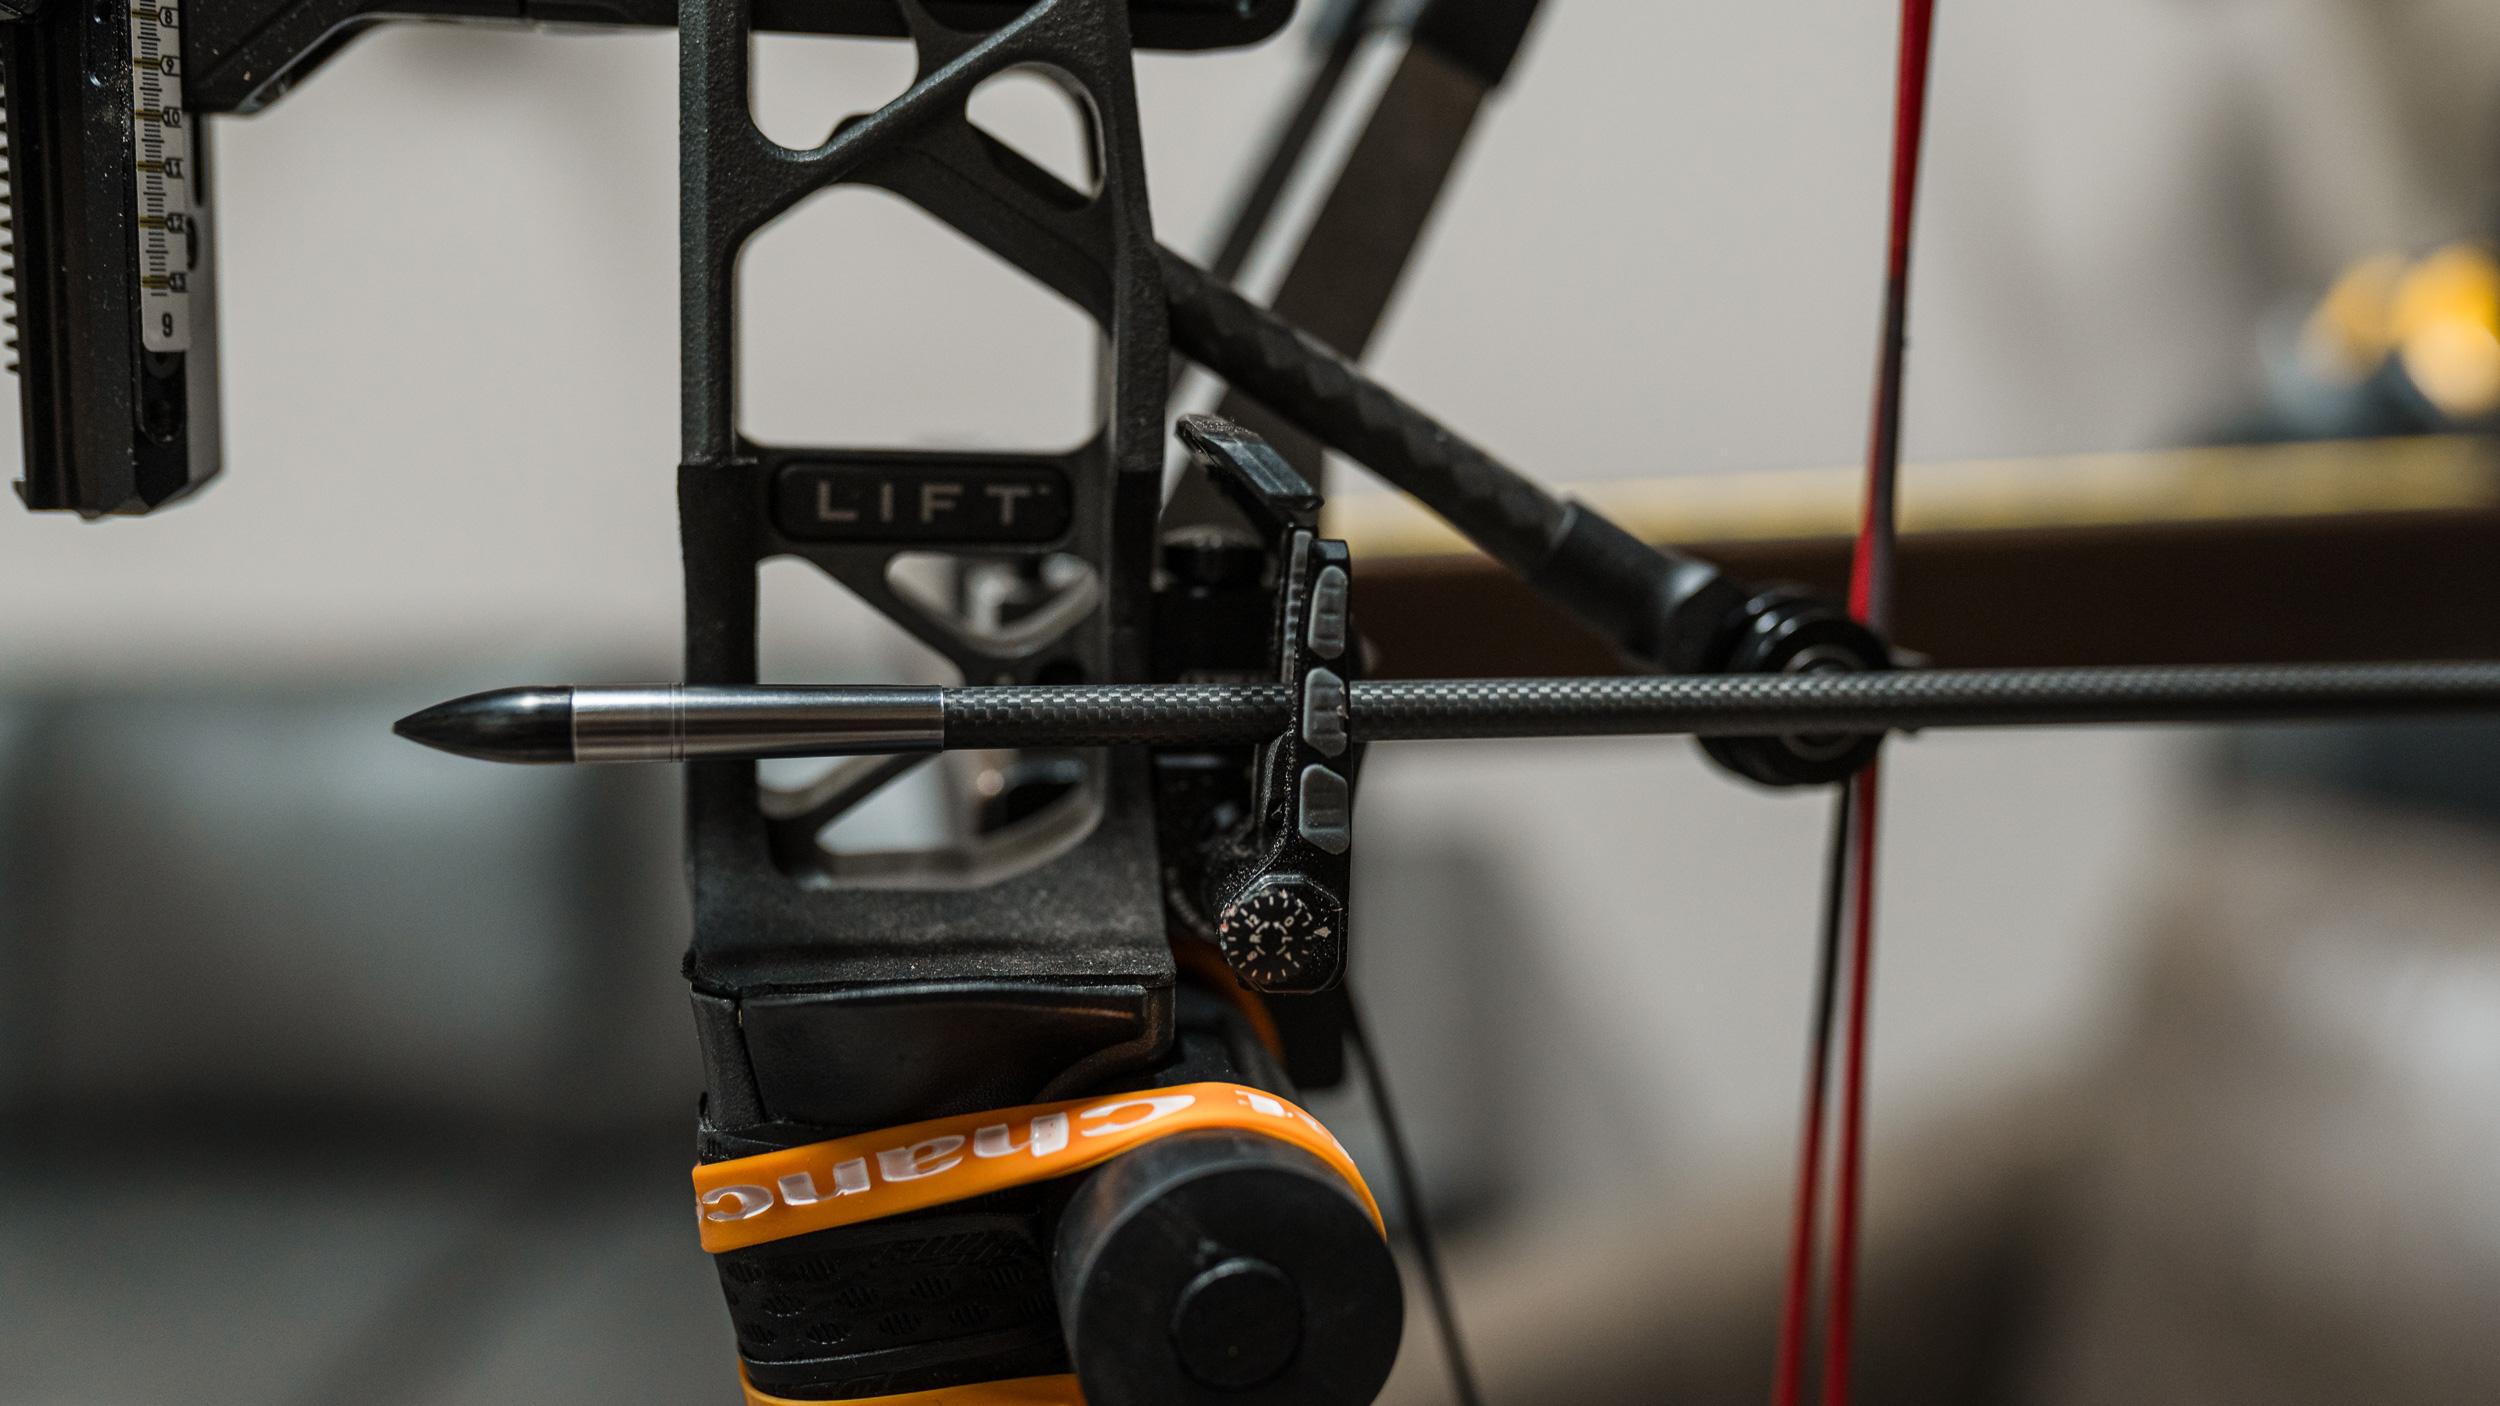
Finally, we have arrived at setup and tuning. First, start out by attaching your rest. When you first attach your rest, it’s common to set the center distance at approximately 13/16s of an inch from the edge of the riser. A good place to start your rest height for most modern bows is to have a nocked arrow running at 90° from the bowstring through the center of the berger hole (aka the rest mounting hole).
At this point in the process, I like to install my peep sight in the string. It doesn’t have to be in the exact position that it will end up, but I want a peep sight installed prior to tying in a nock point and fine-tuning cam timing. The reason for that is the peep sight will take up some space in the string, effectively shortening the string by some amount.
The next step is to tie on a D-loop. This step is somewhat new for me. Historically, I would have tied in a nock point, then installed a D-loop and then moved to tuning. The reason I am tying in a D-loop first before tying a nock point and tuning is because I want to see how the bow aims at various positions — either higher or lower on the center serving.
After I have installed my D-loop in a position that puts my arrow approximately at 90° running through the center of the berger hole, I move to cam timing. I move to cam timing before tying in a nock set because slight adjustments in twisting or untwisting cables to get the draw stops to hit at the exact same time will move the nocking point/D-loop up or down.
If you are using a cable driven drop away arrow rest like the QAD, at this point, you should also insert the drop away cord between the down cable string bundles below the served portion of that cable. You will adjust it later, but the cable inserted between the stands of the bundle will shorten that cable ever so slightly, thus impacting the cam position.
Below is a table to help you make the cam timing adjustments to time your cams/draw stops. Twisting or untwisting the cables will have a much greater impact than twisting or untwisting the string. I’d advise utilizing the cables to work with cam timing to get it as close as possible and only string correction for very minor adjustments. I have also often used a small portion of D-loop material as a spacer to insert between the two string bundles of a cable to effectively shorten the cable of the cam where the draw stop is hitting first. This is a micro adjustment once the timing is very close. Another fix if you are shooting strings and cables where the end loops have not been served is to twist up the small unserved end loops alone.
After I have my cams/draw stops timed perfectly where they contact at the same time, I will install my sight. I will also draw the bow repeatedly and make adjustments to my peep height as I go. Peep height adjustments should be made when there is little or no tension on the string so that you are not going to damage the strands or push uneven twist into the string. So have a partner move it slightly while at full draw, or better yet, press the bow and make them there. I set the final peep height at a later stage, but for now I want it close enough I can align my sight housing and see my pin(s). (My final peep height I will set while shooting at a distance that is the most common or likely in a hunting situation. So for most western big game, I set my final peep height while I am aiming at a 40- to 50-yard target. At that distance, I want to quickly and comfortably be able to look directly through my peep without having to duck my head into the string or raise it while also being able to align my peep with the scope housing ring).
After that, I nock an arrow and, with a small spot on a relatively close target, I will draw and do aiming drills. While doing these aiming drills, I’m considering the draw length as well as noting how stable the bow holds on the spot.
I will slowly rotate the D-loop, moving it up and down the center serving and repeat aiming drills. Make sure to take notes as you go, recording your thoughts on how the bow aims. Eventually, I land on what I feel is a sweet spot. At this stage, don’t worry too much about tune or where the arrow is in relation to the berger hole, we can tune out any issue with the rest height later. (Note: moving your D-loop up or down the center serving will not change cam timing).
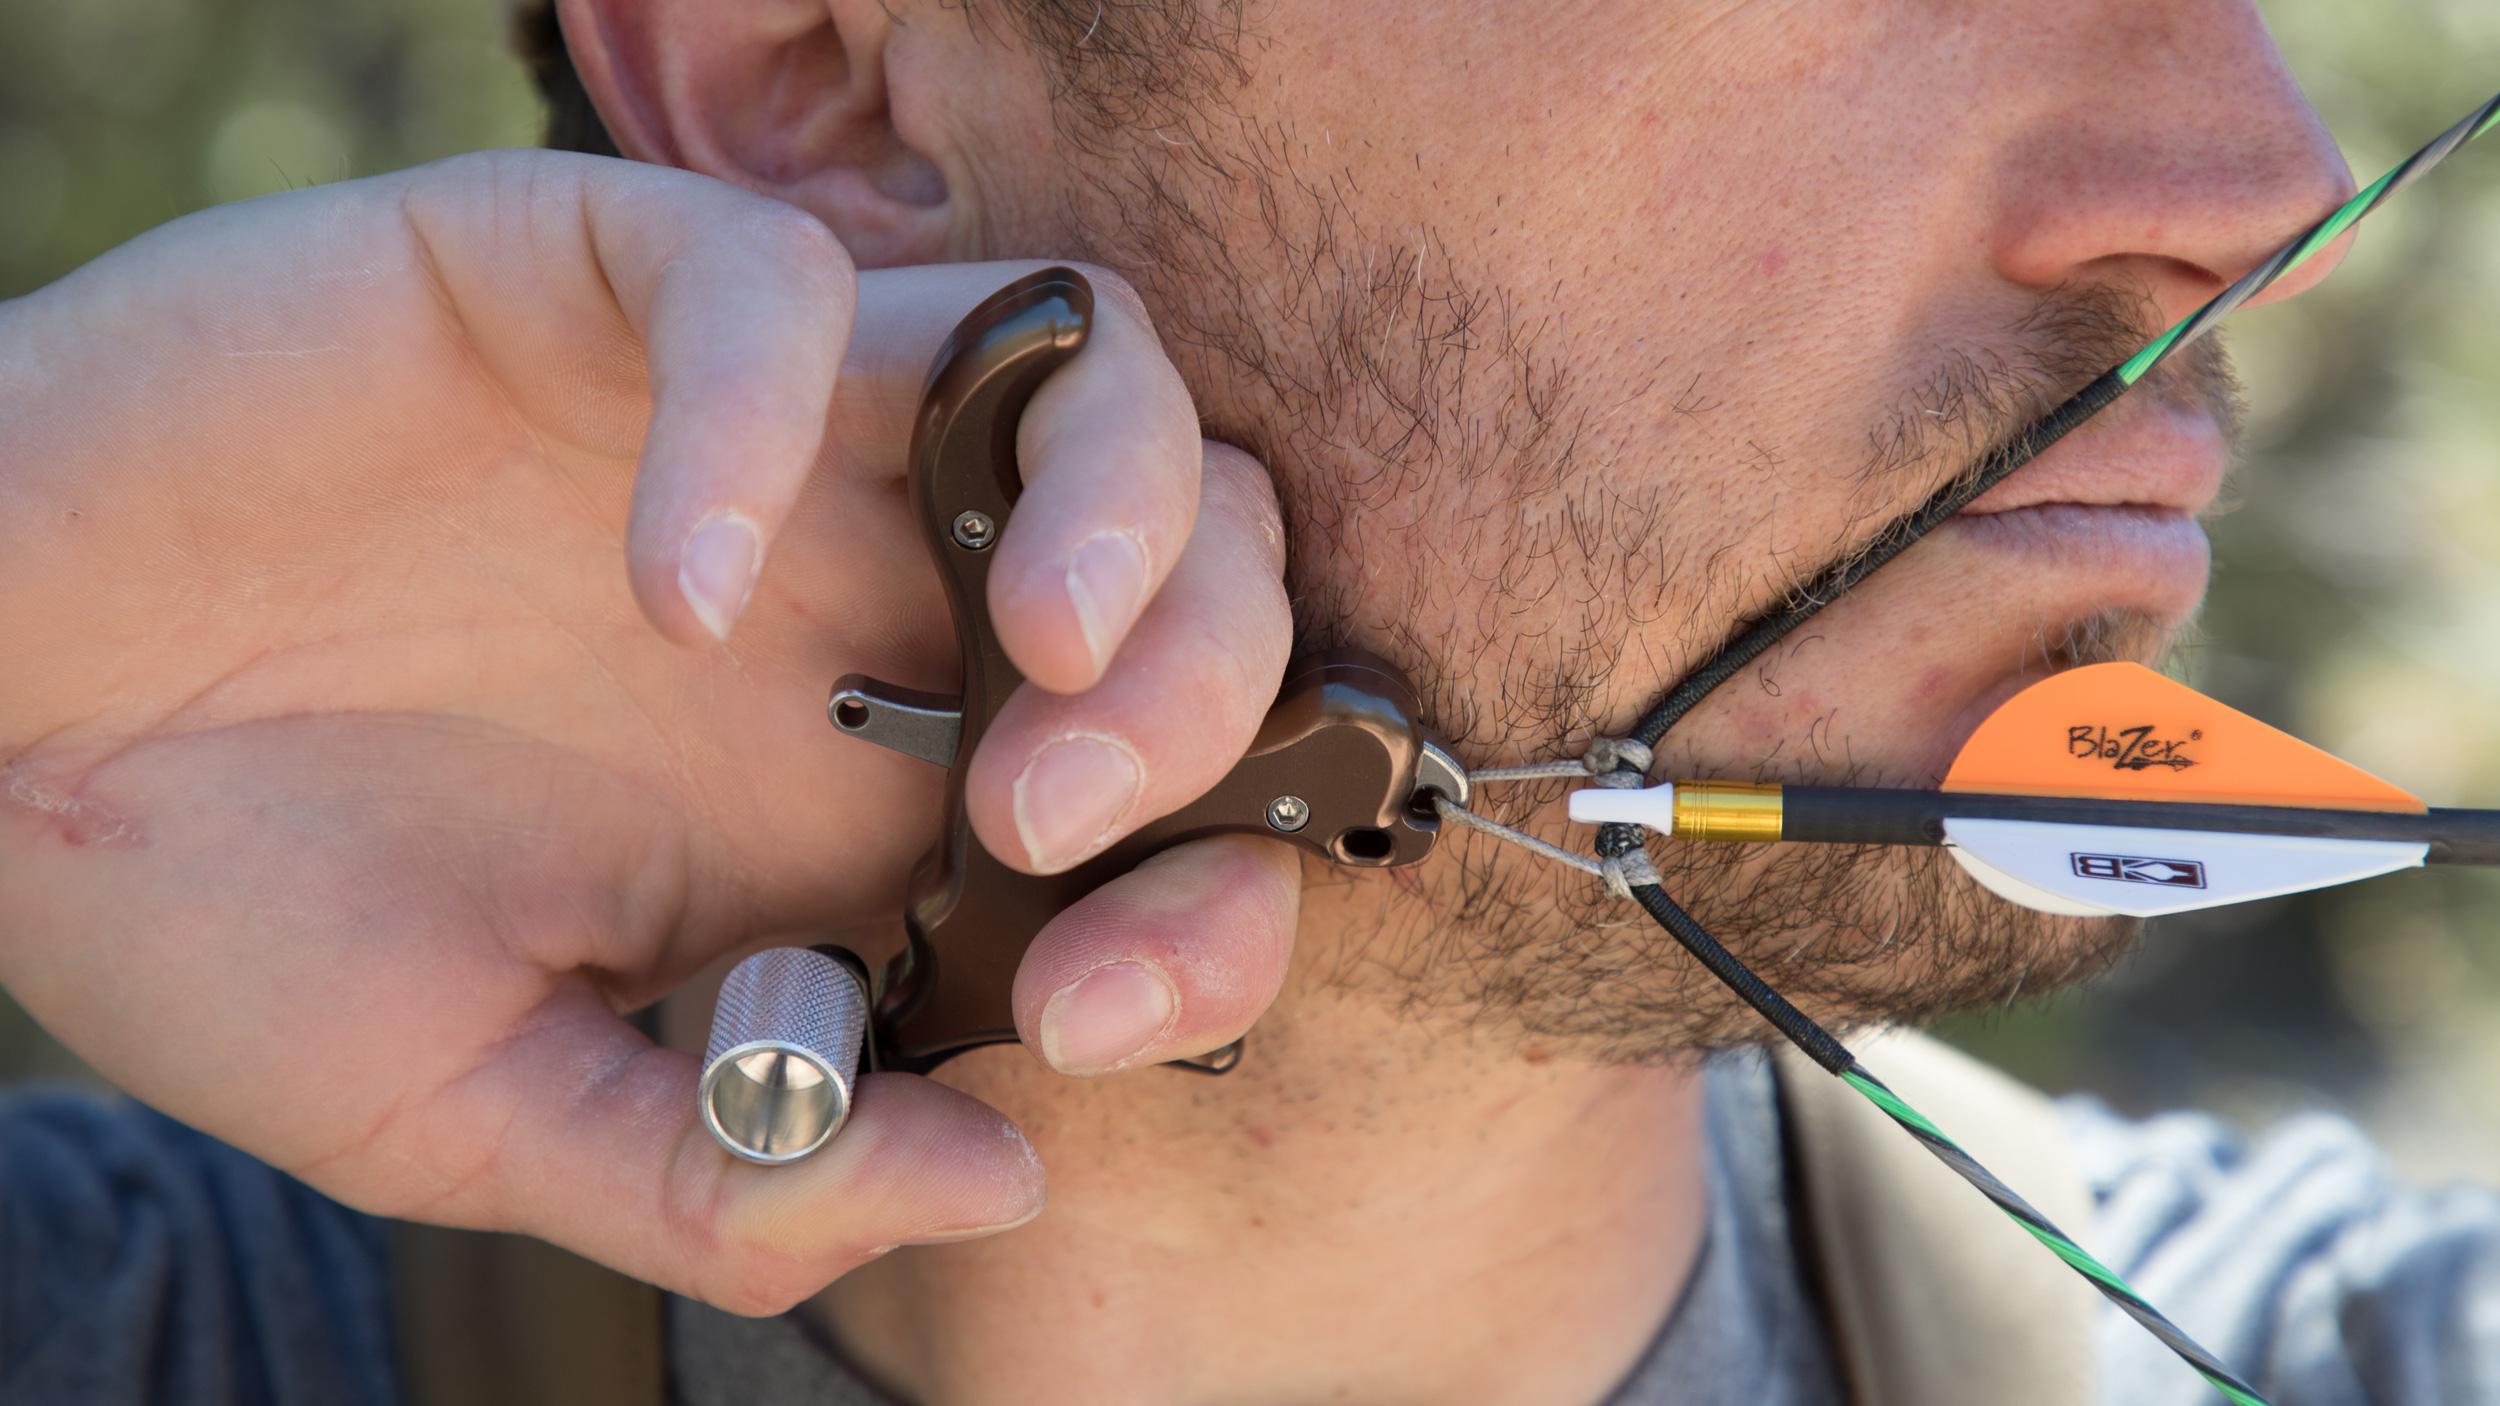
Within reason, after I have found the “sweet spot” for stability and aim, I then tie in a lower nocking point on the center serving just above my lower d-loop knot. The bottom of my D-loop will sit just below the tied in nock point, with the arrow nocked above the nocking point. For many years, I have only tied in a lower nock point. The upper knot of my D-loop sits about a serving’s width above my nock with the bow at rest to provide some room for the nock when the angle of the string becomes acute at full draw. You do not want your nock being pinched while at full draw. Many people like a lower and upper nock point so that the nock is seated between them. I’ve not seen the advantage to that method and, when looking at a nocked arrow on the bow while in a draw board, I feel that only having a lower nock point allows my nock to be seated in a straighter position at full draw. I commonly hear people who use two nock sets say it allows them to replace a D-loop with the confidence that the nocking point is the same. I know many archers who use two nock sets — many of them who are much better than I, so I don’t believe it’s a critical issue, but in my experience, I prefer a single nock point and I’ve tried both. There are top level archers and bowhunters who use both methods. My advice would be to try both, then observe and track the results.
If you have stayed with me this long, it’s time to attach your stabilizers — both your front stabilizer and a backbar if you plan to use one. I do this prior to moving to paper tuning because adding stabilizers and weights can impact the tune (aka how the arrow flies out of the bow).
The arrow spine and the dynamic arrow spine are as critical to your bow's tune as your actual bow is. In essence, within reason, you can tune the bow to your arrow. What I mean by that is with the features and tunability of modern compound bows and rests, you can shift the cams left or right, adjust the cam lean or move the rest left, right, up or down to tune the bow to the arrow.
Arrow spine is the stiffness of the arrow; the lower the number, the stiffer the spine. Static arrow spine is determined by suspending a 29” arrow at each end 28” apart and a 1.94 pound weight is suspended from the center of the shaft. The distance the arrow bends as measured in thousandths of an inch is the static spine number.
Dynamic spine refers to stiffness and how it reacts and recovers in flight as influenced by factors like draw length, draw weight, arrow length, insert and point weight, fletching weight, wrap weight and nock weight. All of these factors will impact the stiffness or spine of the arrow. The goal of building an arrow is to consider those factors to produce one that flies well and recovers quickly. Below is a table to help you understand how shaft length and the components of an arrow impact the spine.
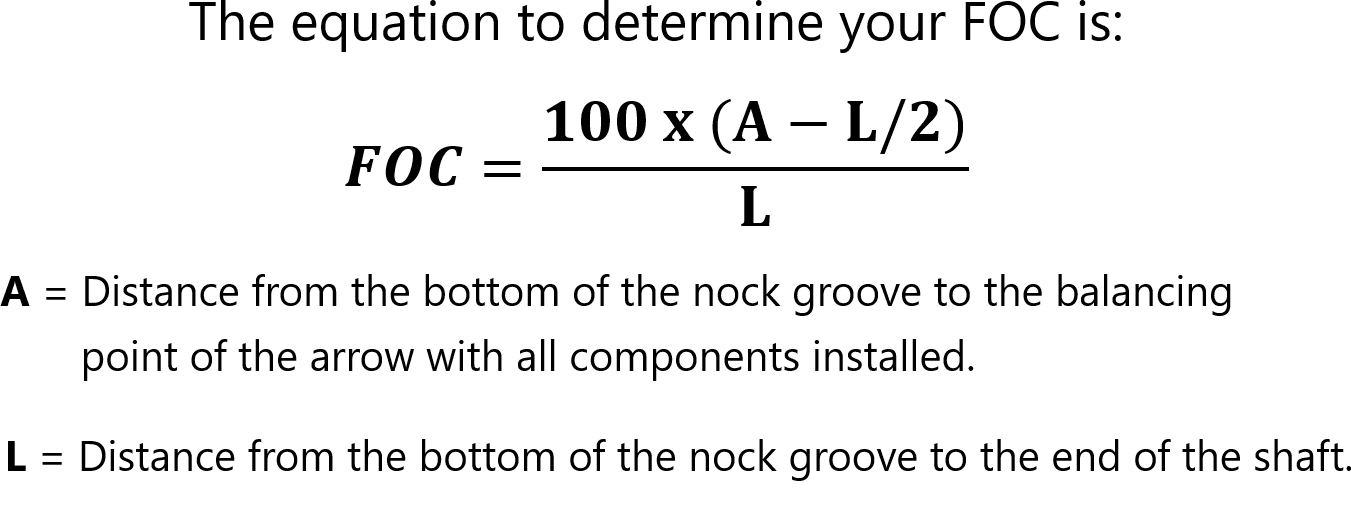
Arrow FOC (front of center) is the percentage of an arrow's total weight located in the front half of the arrow. The higher the FOC is, the more weight is concentrated towards the front. Generally speaking, there is not a golden rule for how much FOC your arrow should have. A good rule of thumb is that it should land somewhere between 10% to 15%.
The reason I note FOC is because the inserts and points you select will impact the spine of the arrow. I often hear from people who are more concerned with building an arrow with high FOC than they are with the dynamic spine and it being a good fit for their bow in regards to flight and forgiveness. As long as you are in the 10% to 15% FOC range and the arrow tunes and groups well, I would not get too caught up chasing an FOC percentage.
To select an arrow build, my suggestion would be to start with a desired total finished weight and approximate FPS range for the species you are hunting. For example, my personal parameters for archery elk and mule deer are a 450- to 500-grain arrow that is traveling at approximately 285 to 300 FPS. Those specs are going to offer me 80+ foot pounds of kinetic energy, a sight picture and pin spacing that I prefer as well as tunable, forgiving, broadhead flight. Once you have your desired specs, you can review each manufacturer's arrow spine chart to help to decide what spine you are most likely to need. A spine chart will take into account your draw weight and arrow length and those correlate to a suggested arrow spine. It’s common to have an arrow that is about one inch of length out in front of your rest, but remember there is room to play with the stiffness of the arrow and weight by lengthening or shortening the shaft as well as selecting heavier or lighter inserts and points.
Once you have a spine recommendation, you can start looking for arrows that might meet your needs. Each arrow manufacturer offers a variety of arrow options in multiple spines that have different grains per inch. For example, the new Victory HLR arrows in a 300 spine are 8.1 grains per inch while a Victory VAP TKO in a 300 spine are 9.5 grains per inch. Both are 300 spines, but a 29” HLR arrow shaft would weigh 234.9 grains while a VAP TKO would weigh 275. Depending on your objectives, individual draw length and draw weight, you can start to pick the arrows, length, spin and components that are the best fit for you. There are also online programs like Archers Advantage that will allow you to select a variety of arrows and components while also inputting your bow and specs, and it will suggest whether the arrow build is going to be too stiff or too weak. These programs are a starting point — not full proof, but can offer good insight as to what might be a great fit for you. My normal process is to consider the weight and speed, spine and components. I will cut a couple arrows and build them, one without fletchings and one with. I will then start to tune with those arrows to see how they respond. It’s important to note here that an individual arrow can react differently from the rest; however, generally speaking, through paper tuning, nock tuning and bar shaft tuning, I will know with those two arrows if I should build out the rest of them to match or if I need to make some adjustments — either in components or length. So let’s get into tuning.
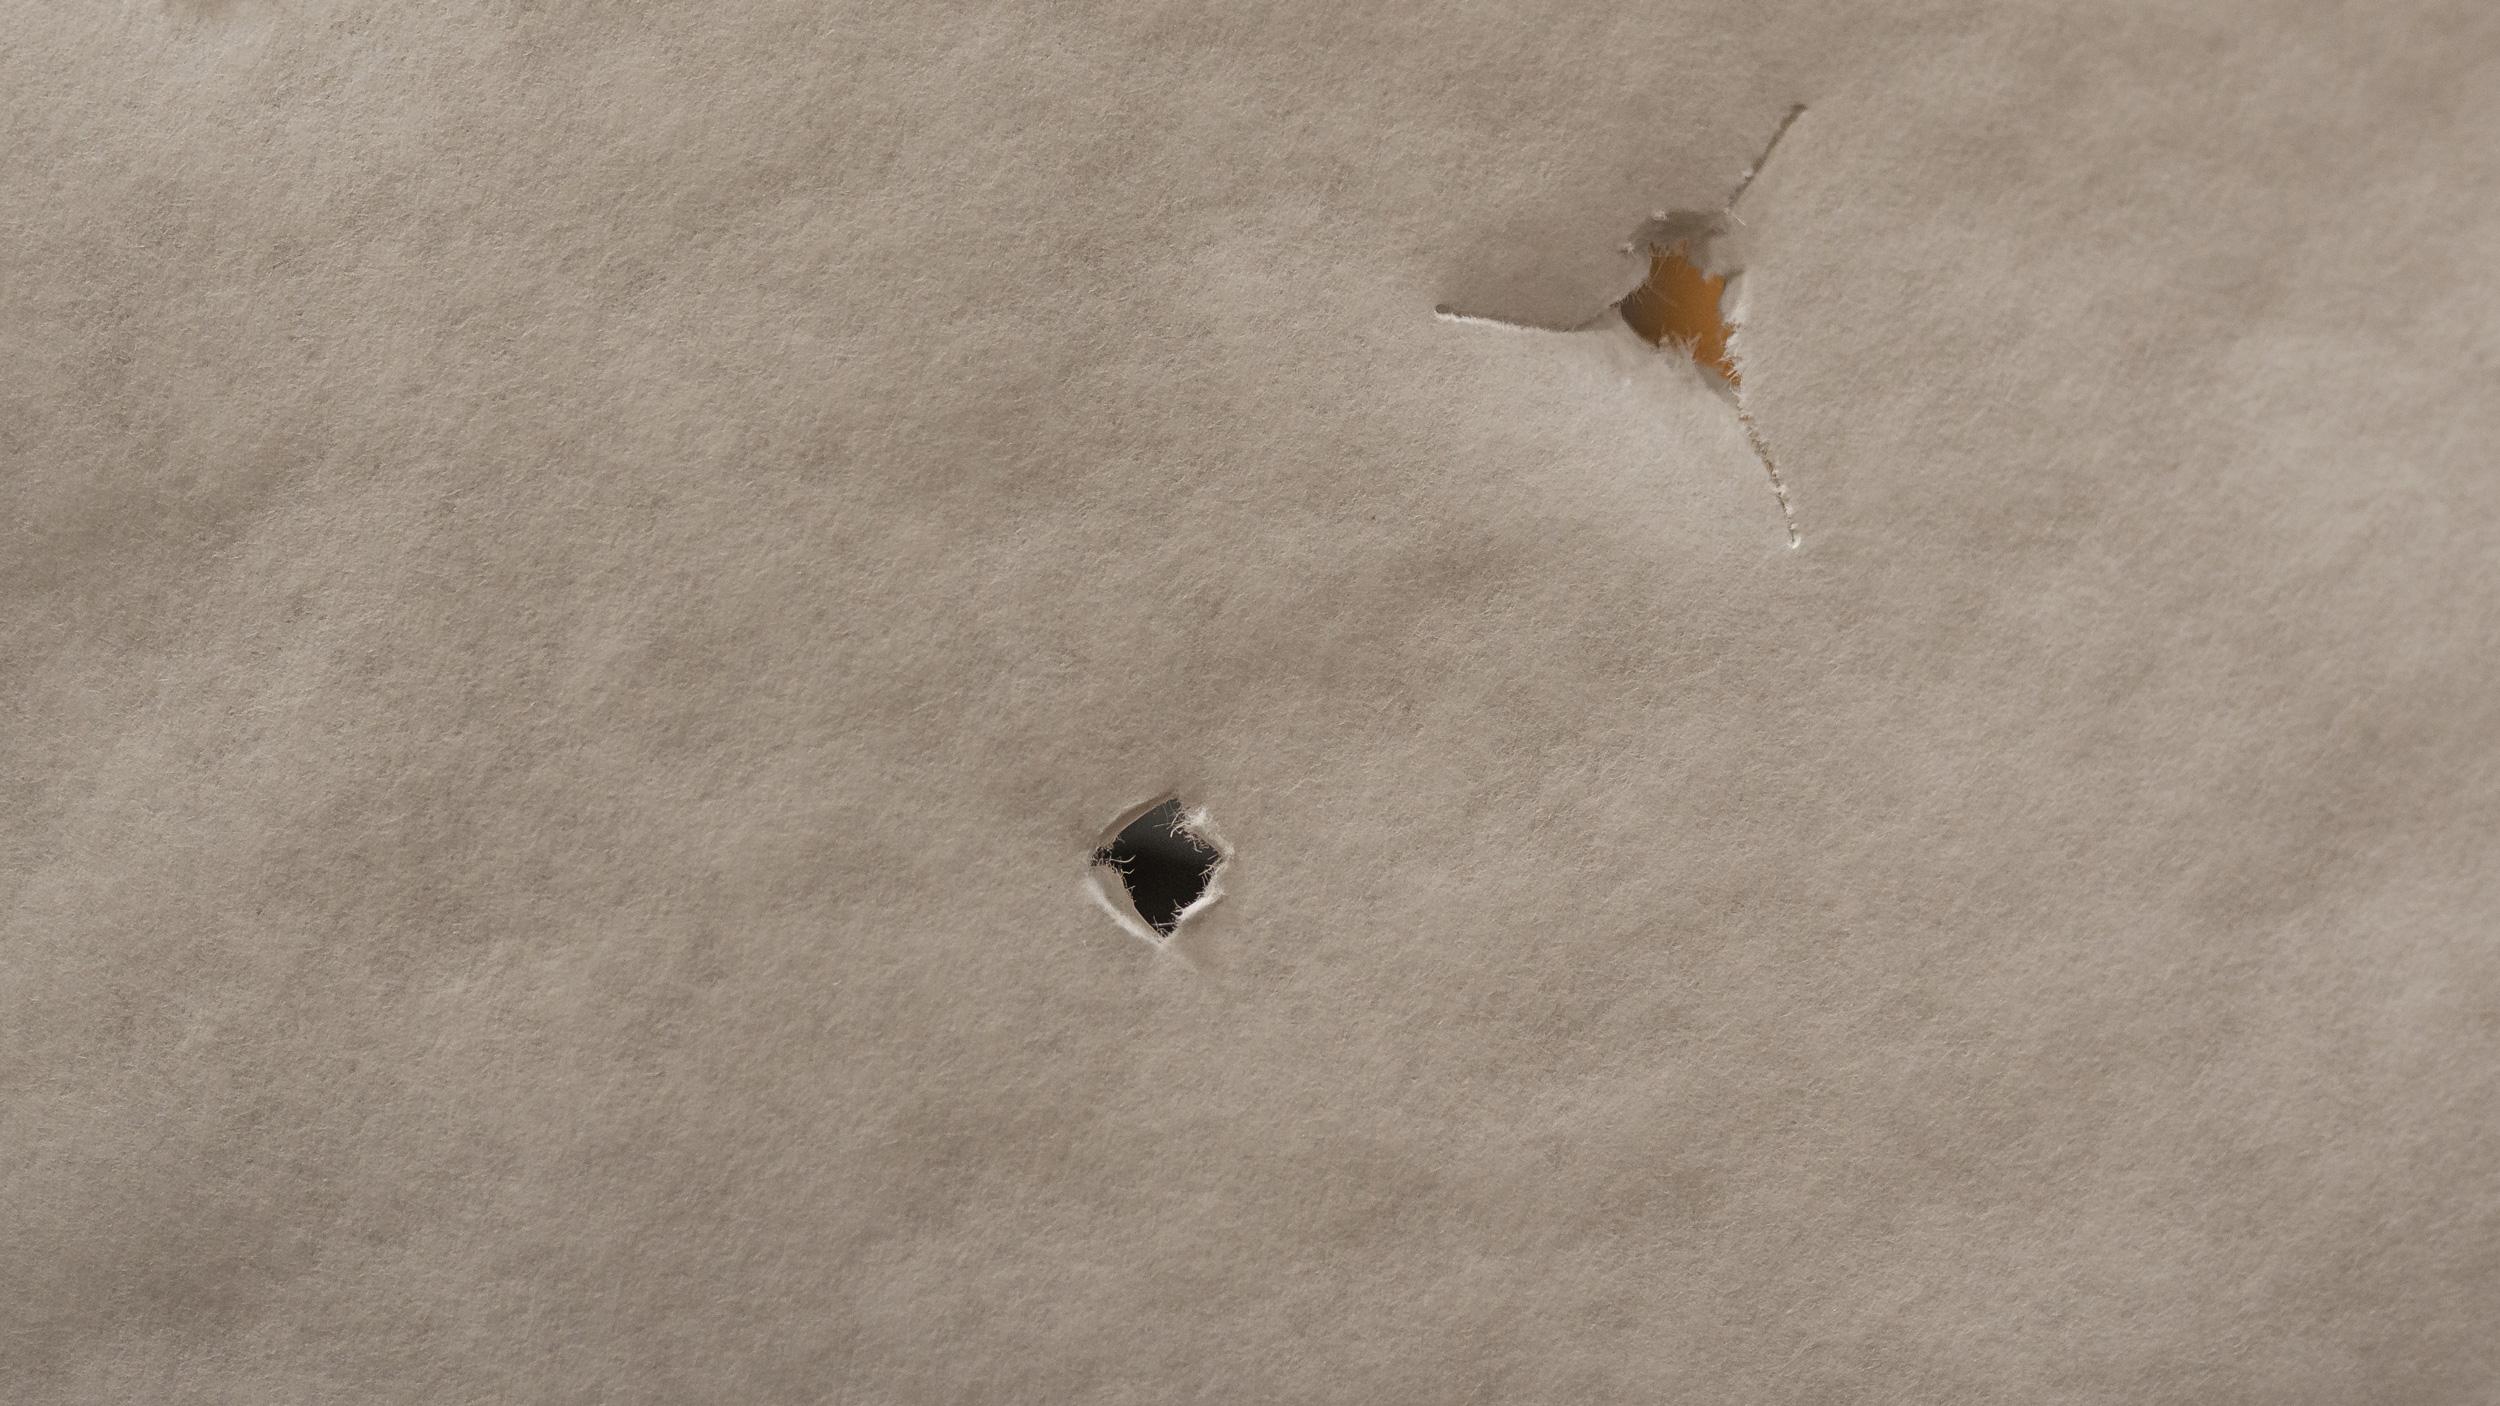
Paper tuning is the first step I take in the tuning process. To paper tune, you will shoot your arrow through a sheet of paper from a relatively close distance to see how the arrow is coming out of the bow and the pattern it leaves in the paper as your arrow passes through it. What you are looking for is a centered perfect hole with your individual vanes tearing through the paper cleanly. I’ve read a lot and tried several different distances to paper tune from. Most people will suggest that 5’ to 6’ is a good starting point. I don’t disagree entirely, but I’ve found that about six to eight yards is where my arrow seems to be showing me the most for the tune of my bow and arrow. I might start from 6’, but most often I jump straight to about seven yards for paper tuning.
Below is a table that can help you understand what the paper tear of your arrow is telling you about tune and how you can fix it.
As indicated on the table above, moving the cams left or right, shifting the pivot of the limb cup or being able to increase the load on one limb or the other is a relatively common feature on most current bows. What I suggest is setting your rest center shot (left/right) at 13/16”, which is approximately the center of the shelf and grip and leaving it there, then use the left/right tuning features of your bow to clean up your left or right paper tear. This leaves your rest in the most centered position, offering good clearance for your vanes. For example, a Mathews Lift X has limb shift technology that allows you to shift the limb channel distance. Elite uses S.E.T technology that micro adjusts the limb cup pivot angle to address the same issue. Other brands have similar features to address tuning without having to move your rest. You can move the rest if you need to, but for most new bows, it should only be used in micro tuning. In regards to high and low tears, one of the most common issues I see are that the bows cams are not timing, meaning one cam is either under or over rotated. Before I move my rest to address a vertical tear, I suggest taking a look, once again, at cam timing to make sure the cam rotations are the same and draw stops are hitting at the same time. If cam timing is good, small rest adjustments can be made up or down.
When paper tuning, if you have a combination of issues, like a high left tear, I suggest addressing one direction of the tear first then moving to the other (i.e., vertical or horizontal), then move to the other. Tuning is problem solving; make a plan, make small adjustments while maintaining notes and work through the process until the solutions and dynamics of it all become second nature. The goal is to get a perfectly clean hole with your point passing through the center and the vanes cleanly tearing through the paper from that center point.
As you can see in the table above, there are multiple actions that someone might take to tune the bow to the arrow or tune the arrow to the bow by cutting it shorter or leaving it longer or by reducing point weight or adding weight to the back of the arrow. You’ll see in the table that moving the nock point is an option to fix a vertical paper tear; however, that is one I rarely use first because, if you remember in a previous step, I have moved my D-loop up and down to find the best aiming or holding position (so I don’t want to move it). I start with the rest, nock orientation, cam timing or arrow spine before I move my nocking point. In addition, your grip, facial contact with the string as the arrow releases or fletching contact can also impact the tune and flight. Lastly, some people like shooting both fletched shafts and bare (unfletched shafts) through paper. Personally, I don’t spend a lot of time shooting bare shafts through paper. I paper tune fletched shafts then move to other fine tuning methods like shooting bare shafts at distance.
Before I move to bare shaft tuning, it’s important to talk about nock tuning.
Nock tuning is simply rotating the nock of the arrow and shooting through paper to examine the results. Most arrows are stiffer on one side and, as it leaves the bow (depending on how the nock sits within it), it may show a directional tear. When the nock is rotated and reshot, it can show perfect results because the spine or arrow is reacting in a way that it likes and is flying true.
Several arrow manufacturers market that their arrows are consistent throughout so that no one side is necessarily stiffer than the other and some companies print a label or line on the stiff side or spine of the arrow. In both cases, I have found it’s still worth testing because, as stated, the spine of the arrow is important to tuning. When you begin paper tuning, it’s important that you try a couple of different arrows to see if the results are consistent. If they are, I still suggest rotating the nocks a quarter turn at a time and repeating the shot through paper to see if the results change. In many cases, you can turn the nock and retest (if the paper tear is minimal) and will get a clean paper tear. For example, I recently paper tuned an arrow and was getting a slight nock high tear. I rotated the arrow on the string and repeated the shot and the paper tear was perfect. If I can get a clean tear with a few arrows by nock tuning without going through other steps like moving my rest or cams, then I know that I can almost always paper tune every single arrow in the dozen simply by nock tuning.
Bare shaft tuning is a bow tuning method where arrows without fletchings are shot to identify and correct bow issues that affect arrow flight. By removing the corrective influence of fletching, bare shaft tuning exposes any imperfections in the bow's setup, such as nock point, rest position or cam alignment that might not be as apparent when fletched arrows are used. Bare shaft tuning is relatively easy to do and is a second step for me to further fine-tune after I have paper tuned my bow. For a bare shaft tune I am looking for my unfletched arrows to hit the same spot as my fletched arrows and, depending on the type of target you are using, enter in the same way (straight). I say depending on the target because some targets, like a soft bag target, can kick arrows in random directions. When I bare shaft tune, I start at 20 yards and progressively move back, shooting fletch shafts and bare shafts and making adjustments to correct the bare shaft point of impact and orientation the arrow enters the target. Minor flaws in the tune of the bow and arrow will show up as you move further away from the target. Also, be aware that minor flaws in your grip, form and shot execution will show up as well since there are no vanes to steer the arrow. Your grip, form, shot execution and follow through have to be dialed in order to get a bare shaft to hit along with your fletched shafts at extended yardages. For most, 20 to 30 yards is what I would consider a good bare shaft tune, but the further back you can get, the more confidence you will have in the tune. One other common tuning mistake I hear is that people will move their sight to try to get their bare shafts or broadheads to impact together. Bare shaft and broadhead tuning is done with the rest, cam, cam timing, nock point and arrow spine — not with the sight. You will eventually adjust your sight once you are certain your bow is tuned with the arrow and vice versus. Below is a table to help you understand what changes to make as you are bare shaft tuning.
The end goal is to micro-tune to the point where your fletch shafts and bare shafts are hitting the same point and entering the target at the same orientation.
If you have paper tuned and bare shaft tuned your bow and arrow combination, your broadheads are highly likely to fly well and impact along with your fletched field point arrows, but that’s no excuse not to also test your broadheads. The process of broadhead tuning is first to sight in your fletched arrows with field points out to a variety of distances and then shoot groups of both field tips and broadhead tipped arrows. One tip I might add is that I shoot my broadheads first prior to field points so I lessen the possibility of destroying vanes or arrows. The goal is to have your broadheads and field points hitting together to your maximum effective shooting distance. I will reiterate: moving your sight to try to achieve this is not fixing the problem. You’ll need to address the tune of the bow and arrow. Once you do so, you can then move your sight/pins to where the broadheads and field points are hitting the intended dot.
I commonly hear from people who are confused about how to move their rest or cams to achieve a good broadhead tune. There is a fair amount of online chatter that you move your rest opposite (left/right) of the broadhead impact(i.e., broadhead hits right, move the rest left or vice versa). This is incorrect. When you are broadhead tuning, the rule is very simple: move the rest in the direction that your broadhead misses. A broadhead missing to the right is an indication of nock left condition. We fix a tail left by moving the rest to the right and the opposite is true, impact left (indicates a tail right condition), which we fix by moving the rest left.
As you make adjustments, you are not likely to see the field points and broadheads impacting the dot you are aiming at. Instead, what you should see is that the broadheads and field points are impacting closer and closer together until they are grouping well. At that point, you can make the adjustments to your sight windage to move both broadheads and fieldpoints into the center of the dot you are aiming at. Below is a table with tuning fixes for broadheads.
Once again, if you have set your nocking point where the bow aims for you the best (within reason) and you have paper tuned and bare shaft tuned by making adjustment to your left/right cam(s) or yokes or limb pocket pivot depending on the bow, your cam timing and your rest — you should have great broadhead flight or very very close to it.
There is a lot of information packed within the article and, understandably, it can seem overwhelming. The best way to begin to tackle tuning on your own is to dive into it and learn as you go with the help provided here. Take it slow, make notes to track changes and work at it consistently. Tuning your own bow and arrow is both satisfying and, in the end, I think you get a much better product due to the fact that no one cares about your accuracy and success as much as you. You can also check out a step-by-step bow build video series at the link below:
In a follow-up article, I will tackle topics like draw length, D-loop length, release selection, and how those all relate. I’ll also cover some topics like broadhead selection and, perhaps, dive more into arrow selection, FPS and kinetic energy. My goal is to use what I have learned to help others have more fun with archery and create better, more successful bowhunters. Building bows and arrows, tuning them and practicing takes time, but it’s worth it. Have fun, do the work and all the best this fall!
For left- and right-handed shooters, the rest adjustment is the same. For example, a left-handed shooter who is getting a nock left paper tear would move their rest to the right. In that case, a left-handed person would move the rest away from the riser; whereas, a right-handed person is moving the rest toward the riser. Both are still moving the rest in the same direction to address the issue.
Nock tear high: meaning the nock/fletching end of the arrow is above where the point went in.
Nock tear low: meaning the nock/fletching end of the arrow is below where the point went in.
Nock tear left: meaning the nock/fletching end of the arrow is left of where the point went in.
Nock tear right: meaning the nock/fletching end of the arrow is right of where the point went in.
If you have paper tuned to a clean paper tear, bare shaft tuning should require very slight adjustments in the rest or cams (left/right). Cam timing can be used to address high/low point-of-impact of bare shafts, but you should have timed your cams perfectly prior, and micro adjustments to the rest height is the preferred option. If you are seeing high or low point-of-impact with bare shafts, it is worth double-checking cam timing before moving the rest.


